

Today, just being on social media isn’t enough. If you want your business to look professional, a Facebook Business Page is a must-have.
A properly set up Business Page means:
- brand awareness — your brand stays visible even to those who haven’t heard of it yet;
- an easy communication channel — customers can DM you or leave a review;
- an additional sales channel — you can sell products and promote services directly on Facebook;
- ad launch capability — without a Business Page you can’t effectively use Facebook Ads.
In this article, we’ll cover how to create a Business Page the right way, the tips that make it effective, and what you need for successful promotion in 2025. Let’s go!
How is a Business Page different from a group?
A Business Page is a public profile for a company or personal brand. A group is more about community and interaction. In groups, all members can post. You can also make a group private. If a Business Page is your brand’s storefront, a group is the place for conversation among followers.
Main differences:
- Who posts content: in a group — any member; on a Business Page — only you or the admins you assign.
- Visibility: a page is always public; a group can be public or private.
- Promotion: you can promote a Business Page via Facebook Ads, but not a group.
- Analytics: pages have detailed stats (reach, engagement, audience demographics); groups, unfortunately, do not.
Create a Facebook Business Page: step-by-step
1. Set up your personal profile
To create a Business Page, you need to link it to an existing Facebook account. Important: don’t worry — the owner’s personal data will not be displayed on the Fan Page.
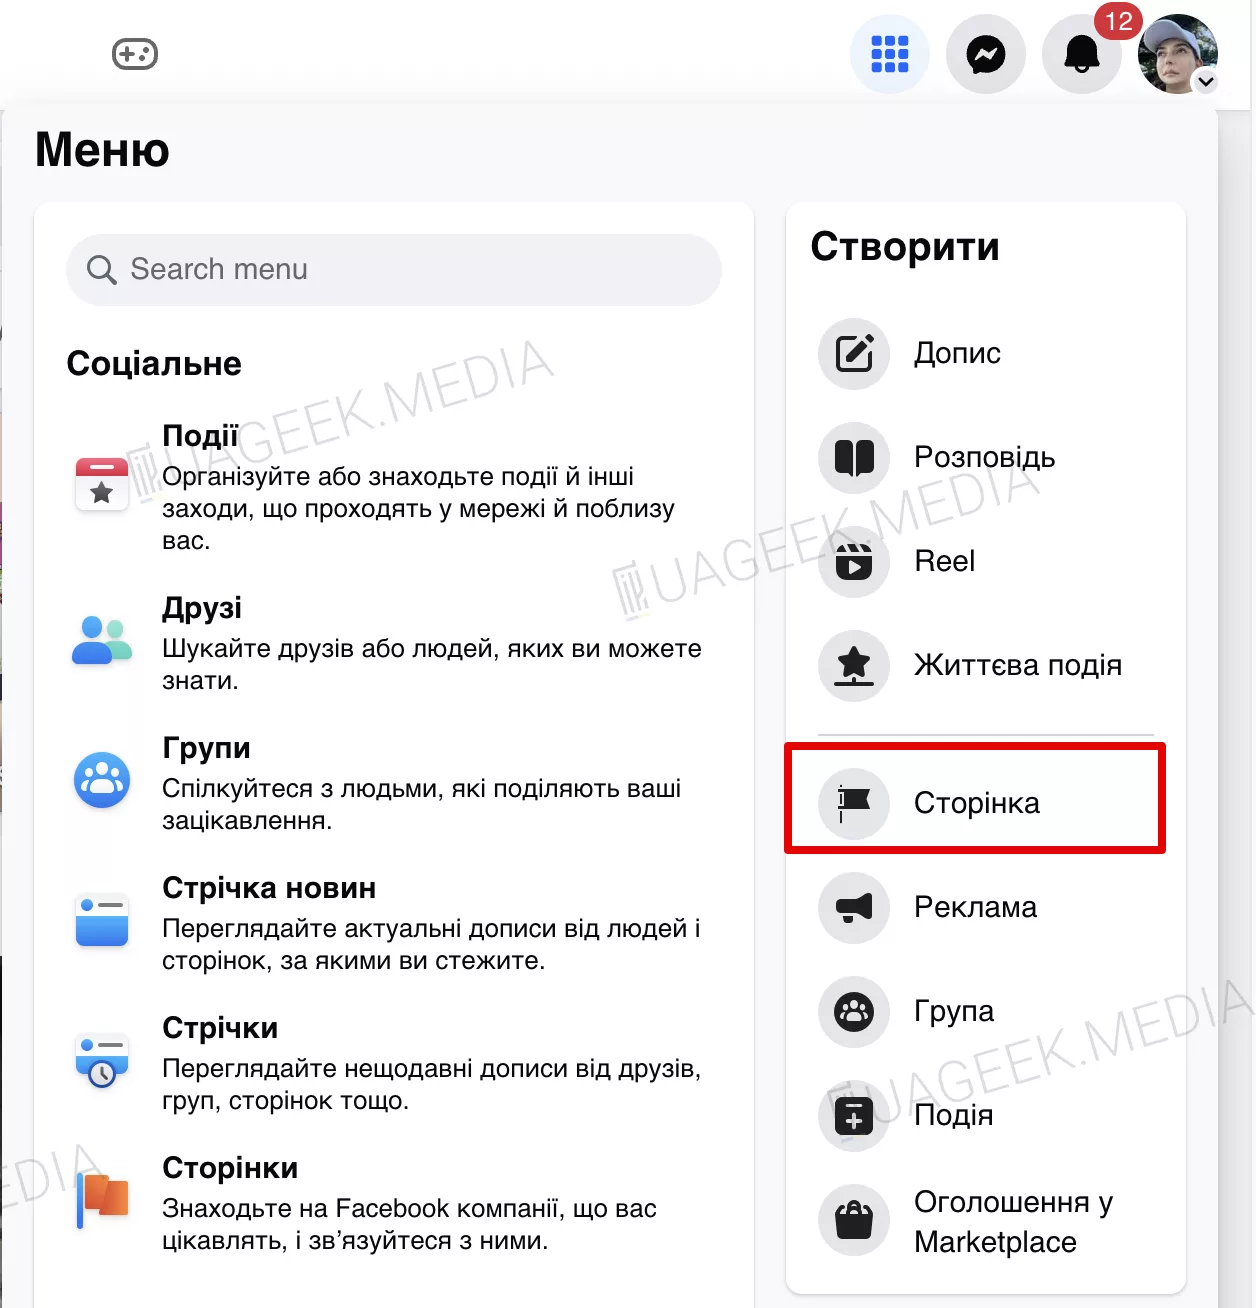
Open Facebook and log in. Then, as shown in the screenshot below, click “Create Page” (or simply find the “Page” section in the main menu).
2. Fill in your information
In the left settings panel, enter the basic details about your brand or company. To preview how your page will look, you’ll see a live preview on the right — exactly how users will see your Fan Page.
- Name of company/brand/product: this is how users will find you on Facebook.
- Category: start typing keywords that best describe your niche or product focus — Facebook will suggest categories. You can choose up to three.
- Bio (story or description): briefly describe your product, your mission, and your unique value. This field is optional, but it positively impacts SEO and user perception.
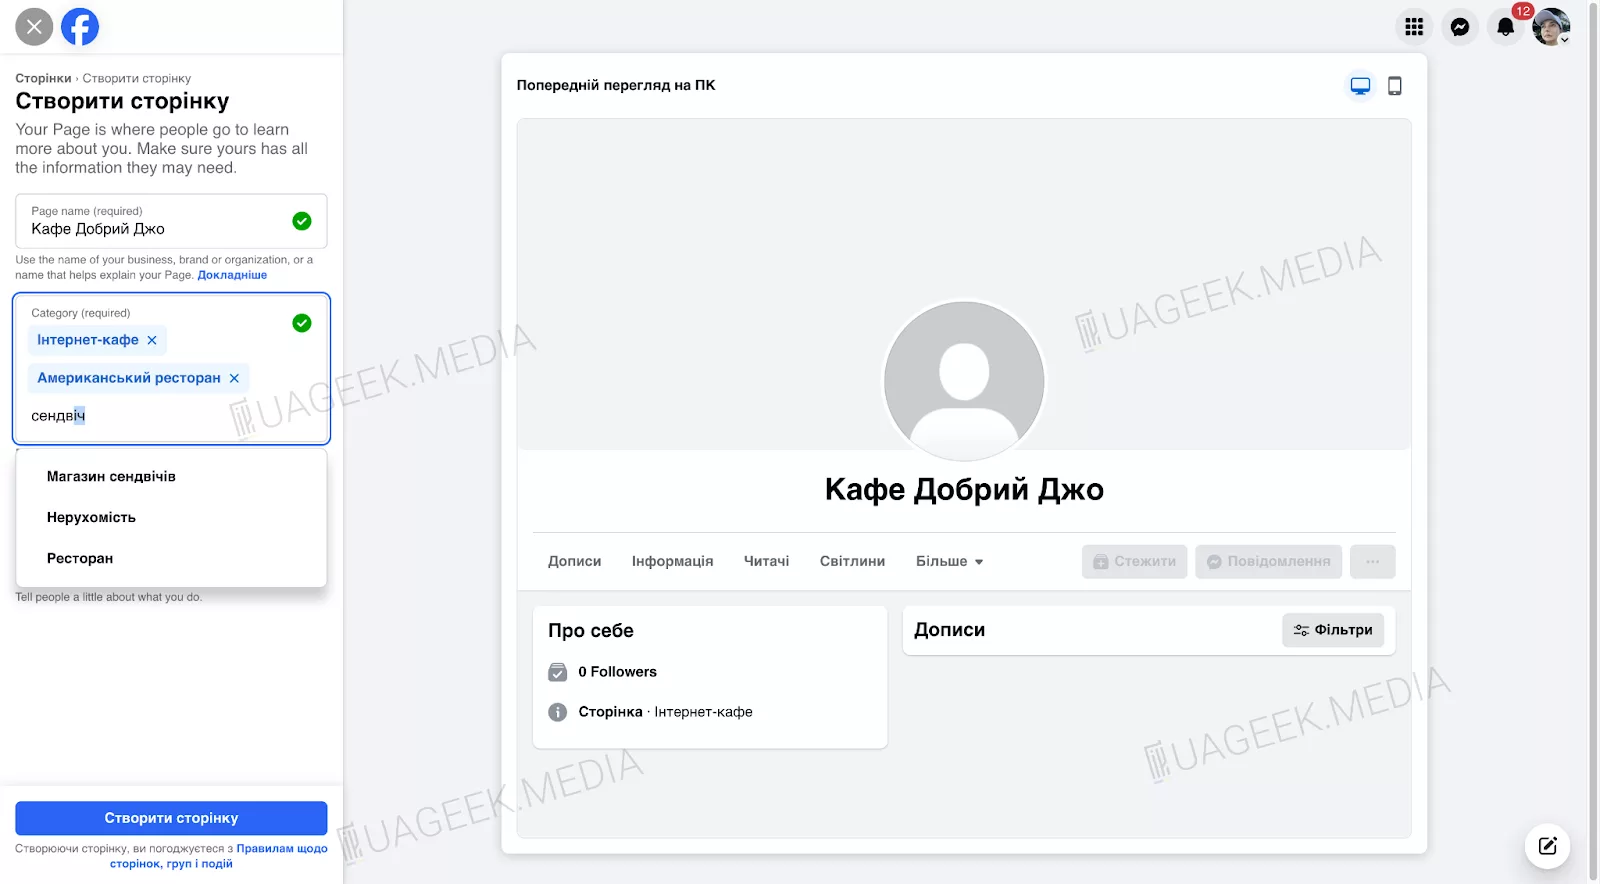
After filling in all fields, click “Create Page.”
3. Contact details
Often, your Business Page is where a user first learns about your company or product. We recommend filling out all relevant information. You can always edit it later.
- Contact info: add a current phone number, email, and website (if you have one). Note: these fields are public and cannot be hidden.
- Location: if you operate offline, add your physical address. You can skip this if you’re online-only.
- Business hours: add opening hours if applicable.
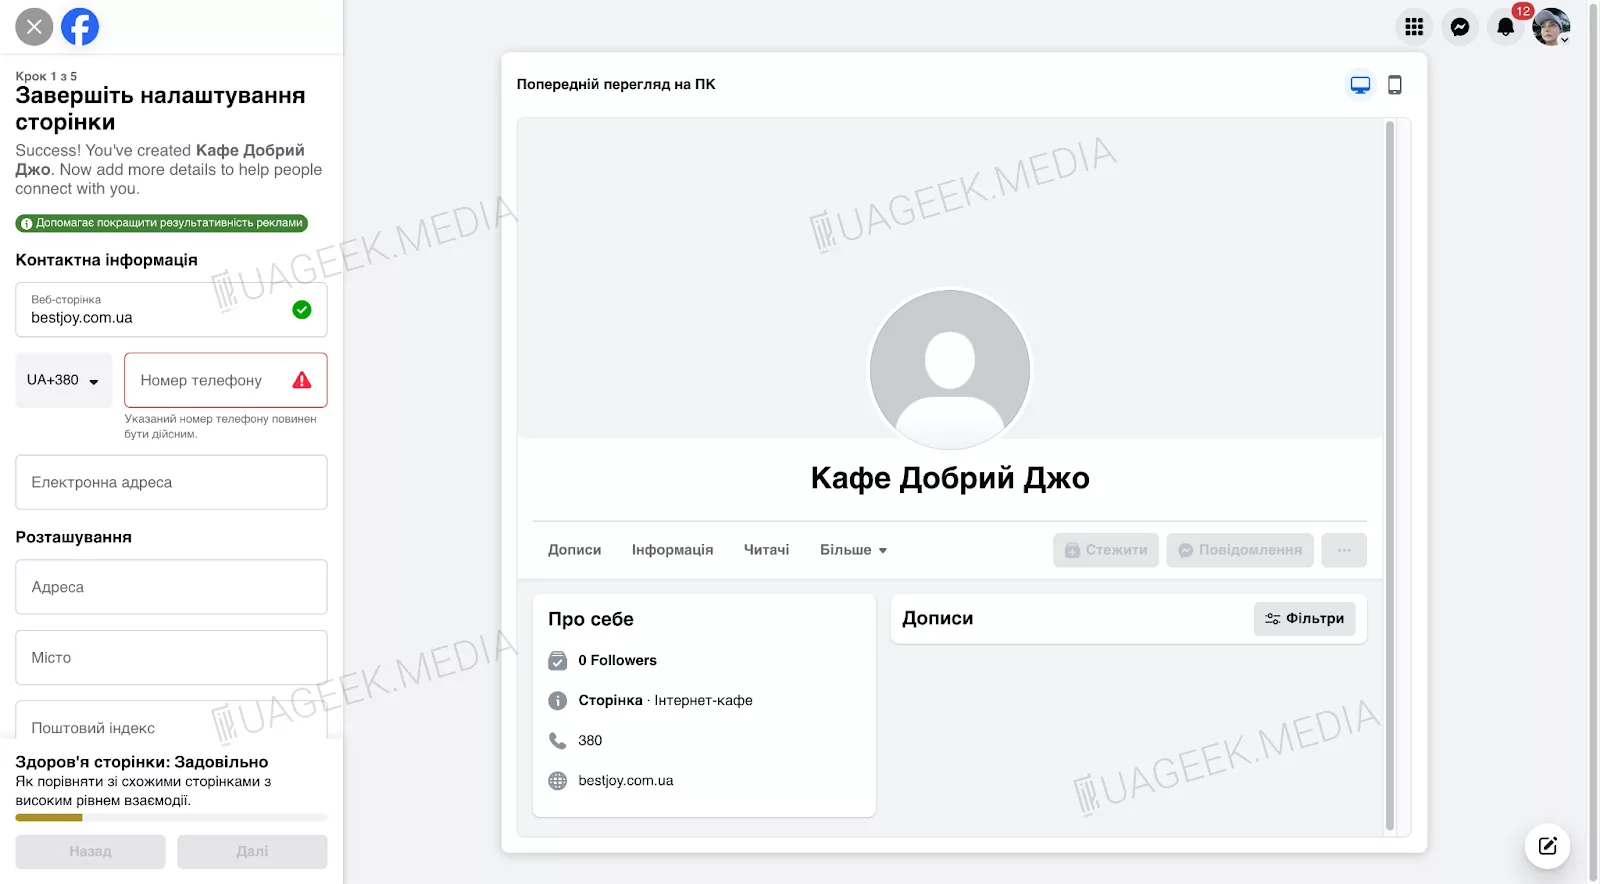
Once done, click “Next” to proceed.
4. Profile photo and Call-to-Action
The first thing users see when they land on your Business Page is the profile photo and the Call-to-Action (CTA) button. These shape the first impression — and you only get one.
Profile photo: minimal detail, maximum recognizability
- What to use? The best option is your company logo or a recognizable symbol. Avoid complex images with tiny elements — they’re illegible in small formats.
- Recommended size: 170 × 170 px (128 × 128 px on mobile).
- Remember the profile photo is displayed inside a circle — keep all important elements centered.
Cover image
If the profile photo is your brand mark, the cover is your visual storefront. It’s the first thing that catches the eye when someone lands on your page.
- Make the cover work, not just exist. The ideal option is a clean banner with a clear message.
- Minimum size — 820 × 312 px.
- Facebook may crop edges on mobile, so avoid critical elements near the sides.
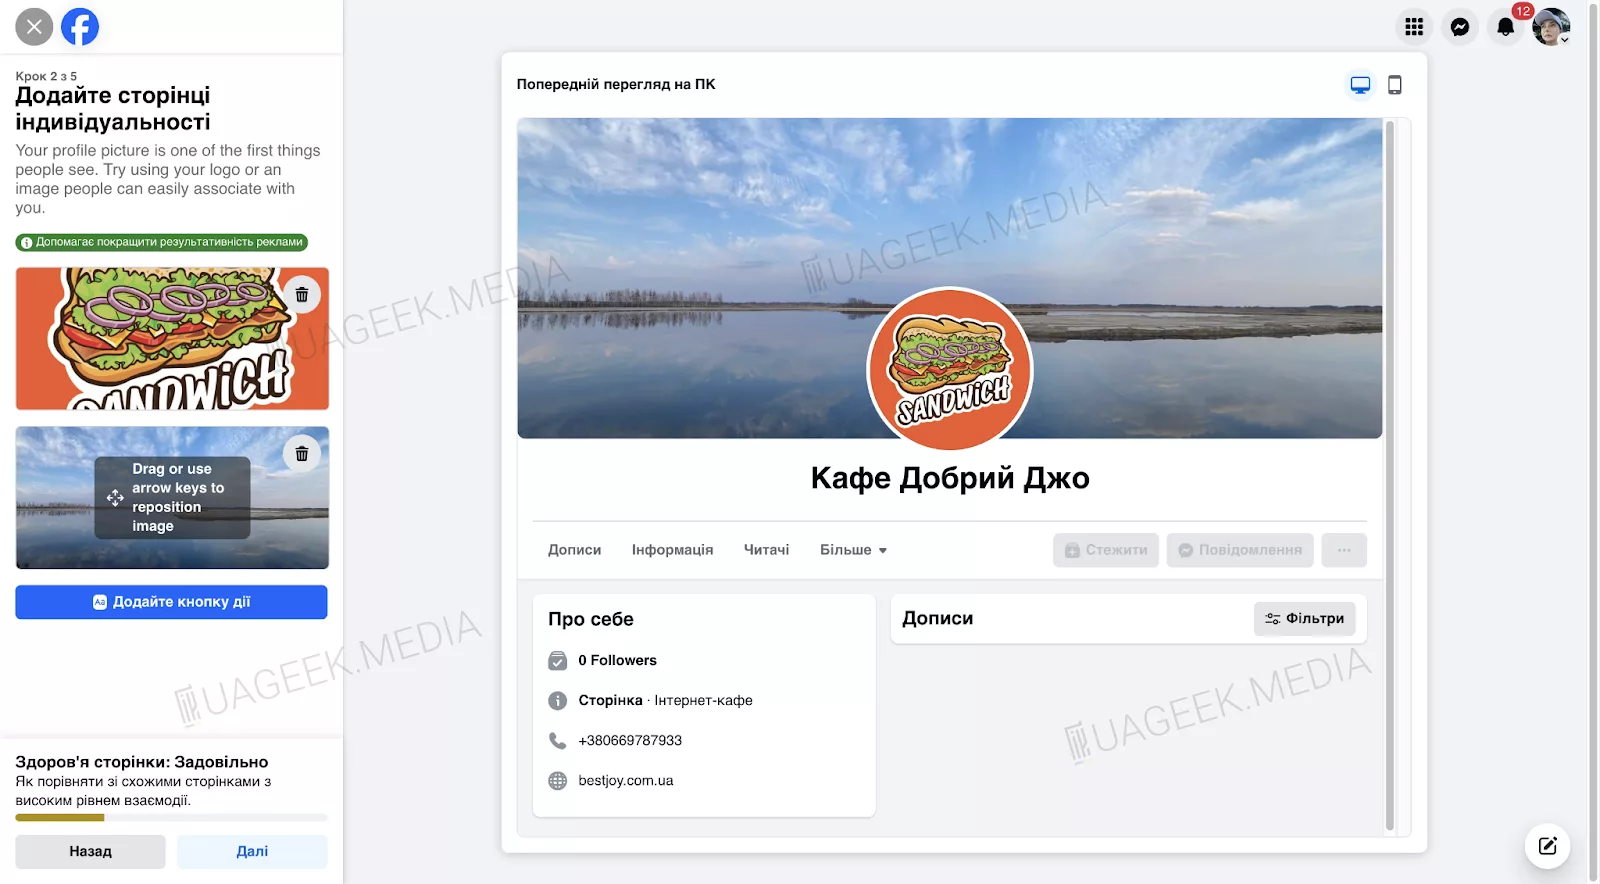
After uploading your images, be sure to check how the page looks to users. In the top-right corner, use the preview option (for both mobile and desktop).
Call-to-Action (CTA)
The CTA button literally nudges the user to the next step. Facebook lets you add one of several buttons, depending on what you want from your audience:
- “Make a purchase” — ideal if you sell online. The customer goes straight to checkout with zero friction.
- “Book now” — great for businesses where a client chooses a time (restaurants, salons, gyms, etc.).
- “Join group” — a must-have for brands building community. If you have an active Facebook group, this button funnels interested people there immediately.
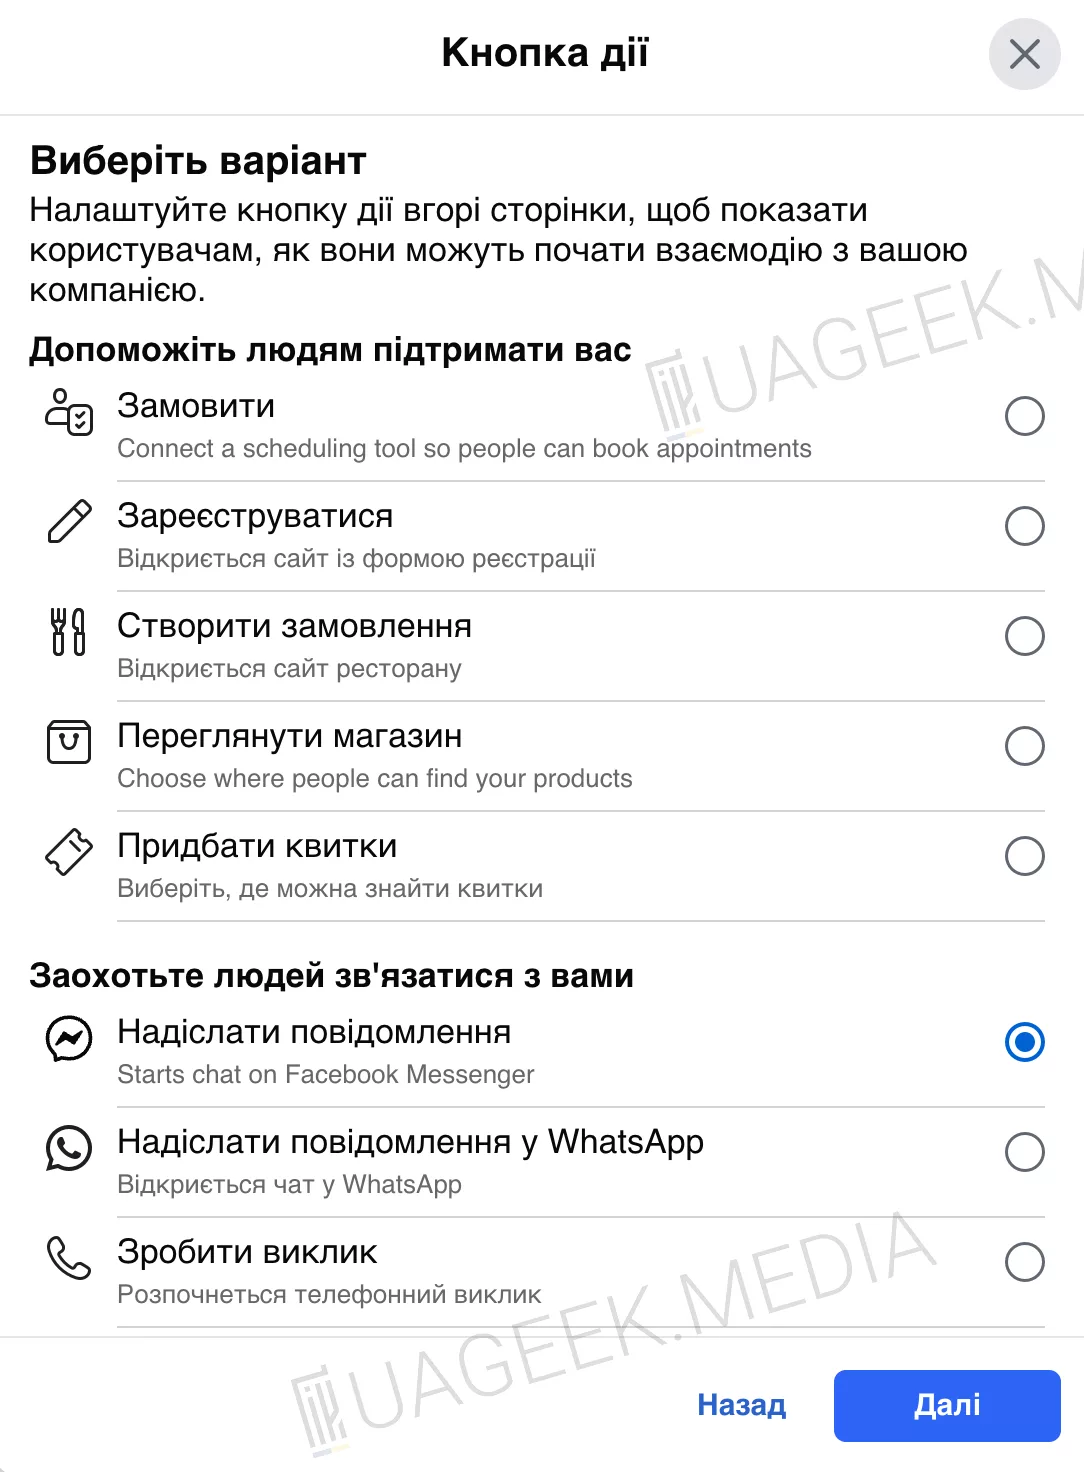
Choose the most suitable option and click “Next.”
5. Integrate WhatsApp
If you want customers to contact you in one click, integrate WhatsApp into your Business Page. It’s one of the most convenient ways to communicate, since most users prefer messaging to filling out forms.
How to set it up?
- Enter the phone number linked to your WhatsApp Business.
- Receive the SMS verification code and enter it.
- Done! A WhatsApp button will now appear on your page.
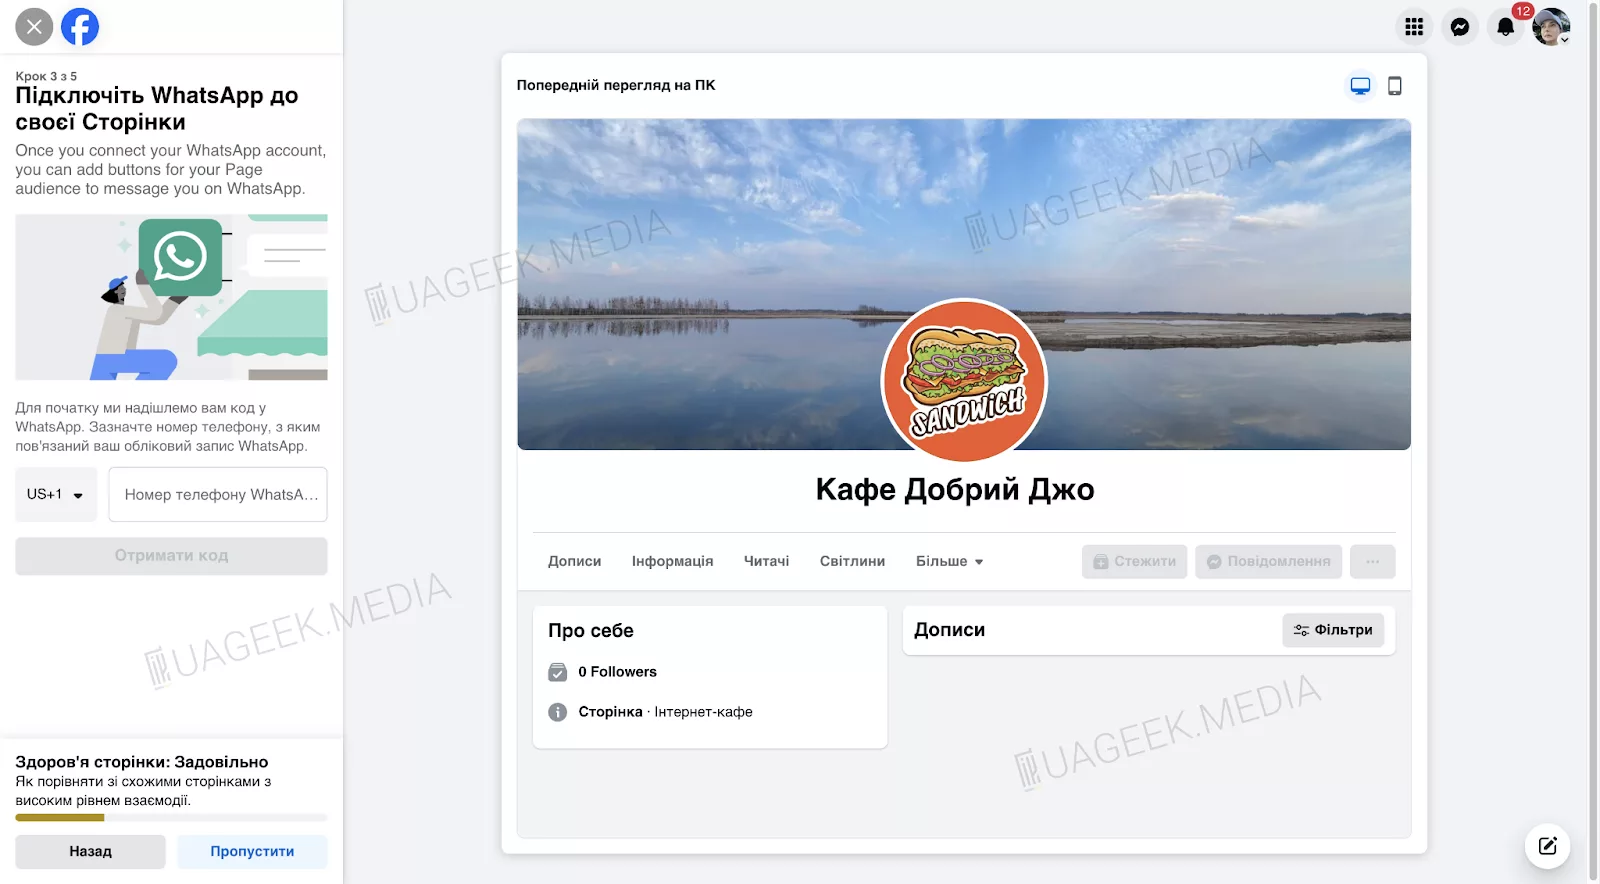
Don’t want to use a messenger? Just click “Skip.”
6. Invite your first followers
To make your page look alive, you need to add content and attract your first followers.
What to do:
- Click “Invite friends.”
- Select people who might be interested in your page.
- Send invites — they’ll get a Facebook notification.
Don’t skip this step: even a few initial followers make the page appear active, which helps Facebook’s algorithms.
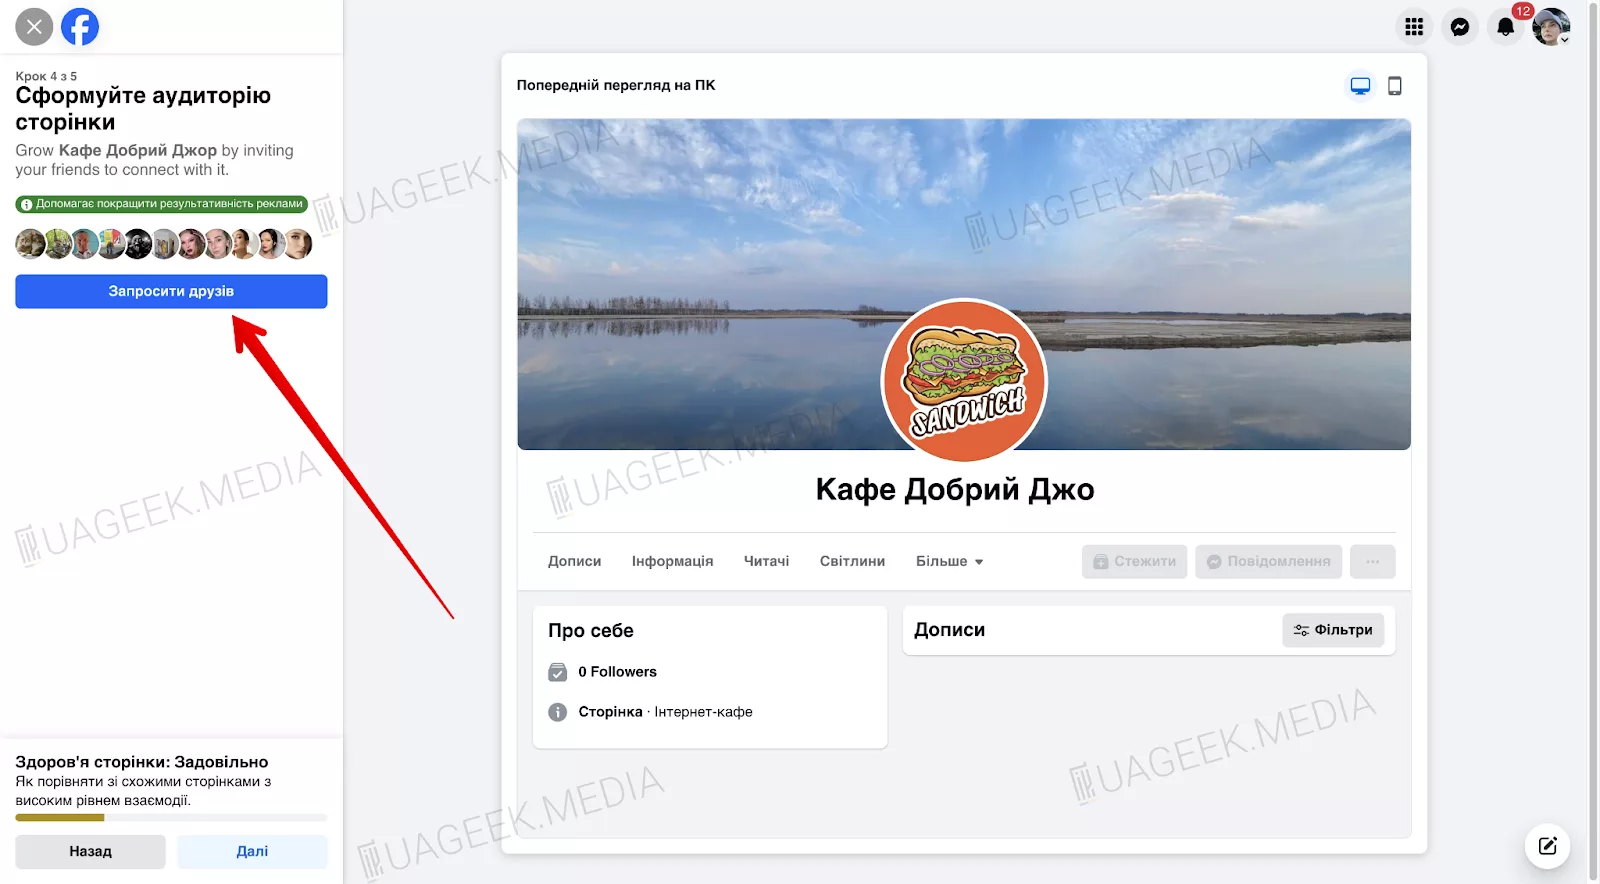
To continue, click “Next.”
7. Turn on notifications so you don’t miss anything
Facebook lets you control everything happening on your page. You can get instant alerts about new comments, messages, follow requests, and more.
- Go to your Page “Settings.”
Find the “Notifications” section. - Choose which updates you want to receive (new messages, post comments, reviews, reactions).
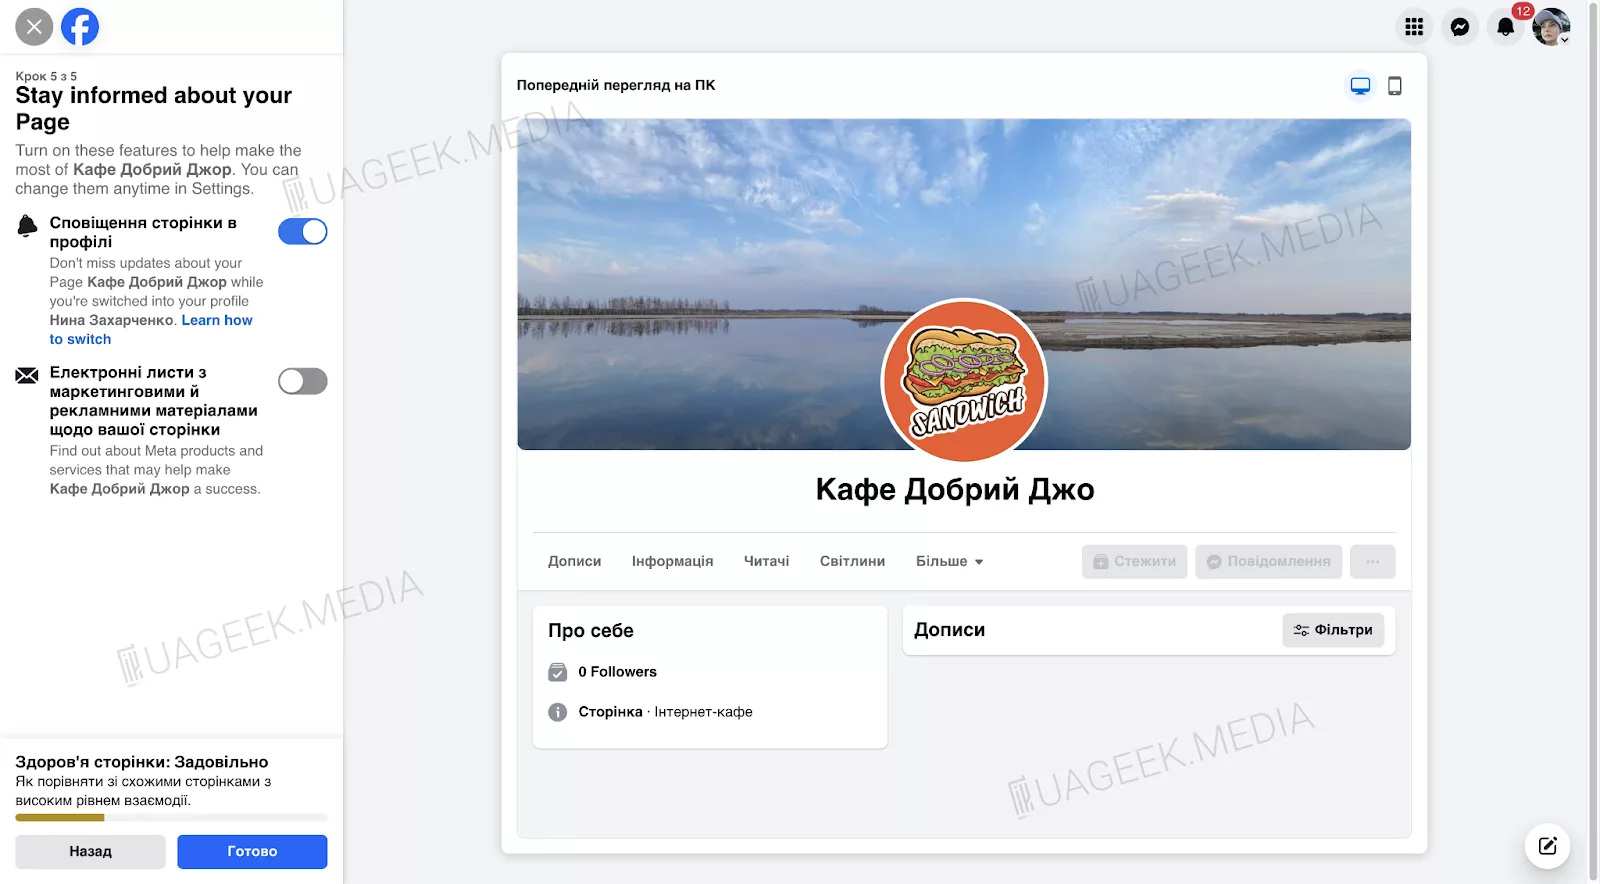
Facebook may also suggest subscribing to ad updates — useful if you plan to run ads. When you’re done configuring, click “Next.”
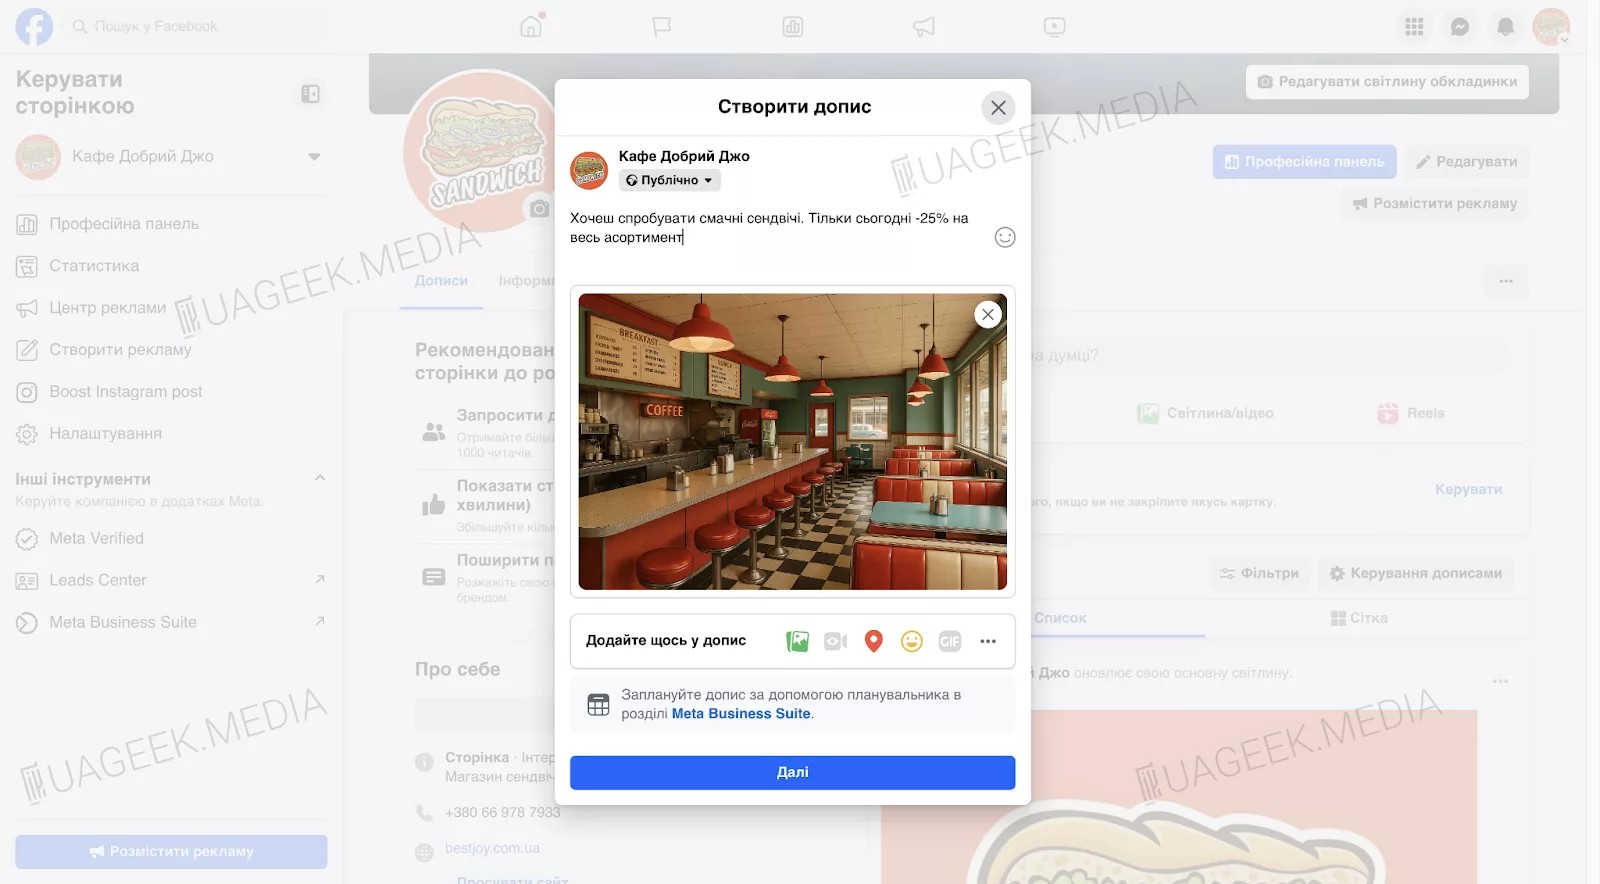
8. Time to publish content!
Your page is ready — now bring it to life! An empty profile won’t build trust, so start posting engaging content right away.
What can you post?
- News — share what’s happening in your business.
- Photos and videos — showcase products, behind-the-scenes moments, real customer testimonials.
- Polls — spark interaction with your followers.
- Live streams — if you’re ready to chat “live.”
Post at least 3–4 times a week — activity is crucial for page growth.
9. Add an admin
Not planning to manage the page yourself? Delegate to admins — they can help run the page.
How to add an admin?
- Go to “Page settings.”
- Select “Page access.”
- Click “Add new” and enter the person’s name or email.
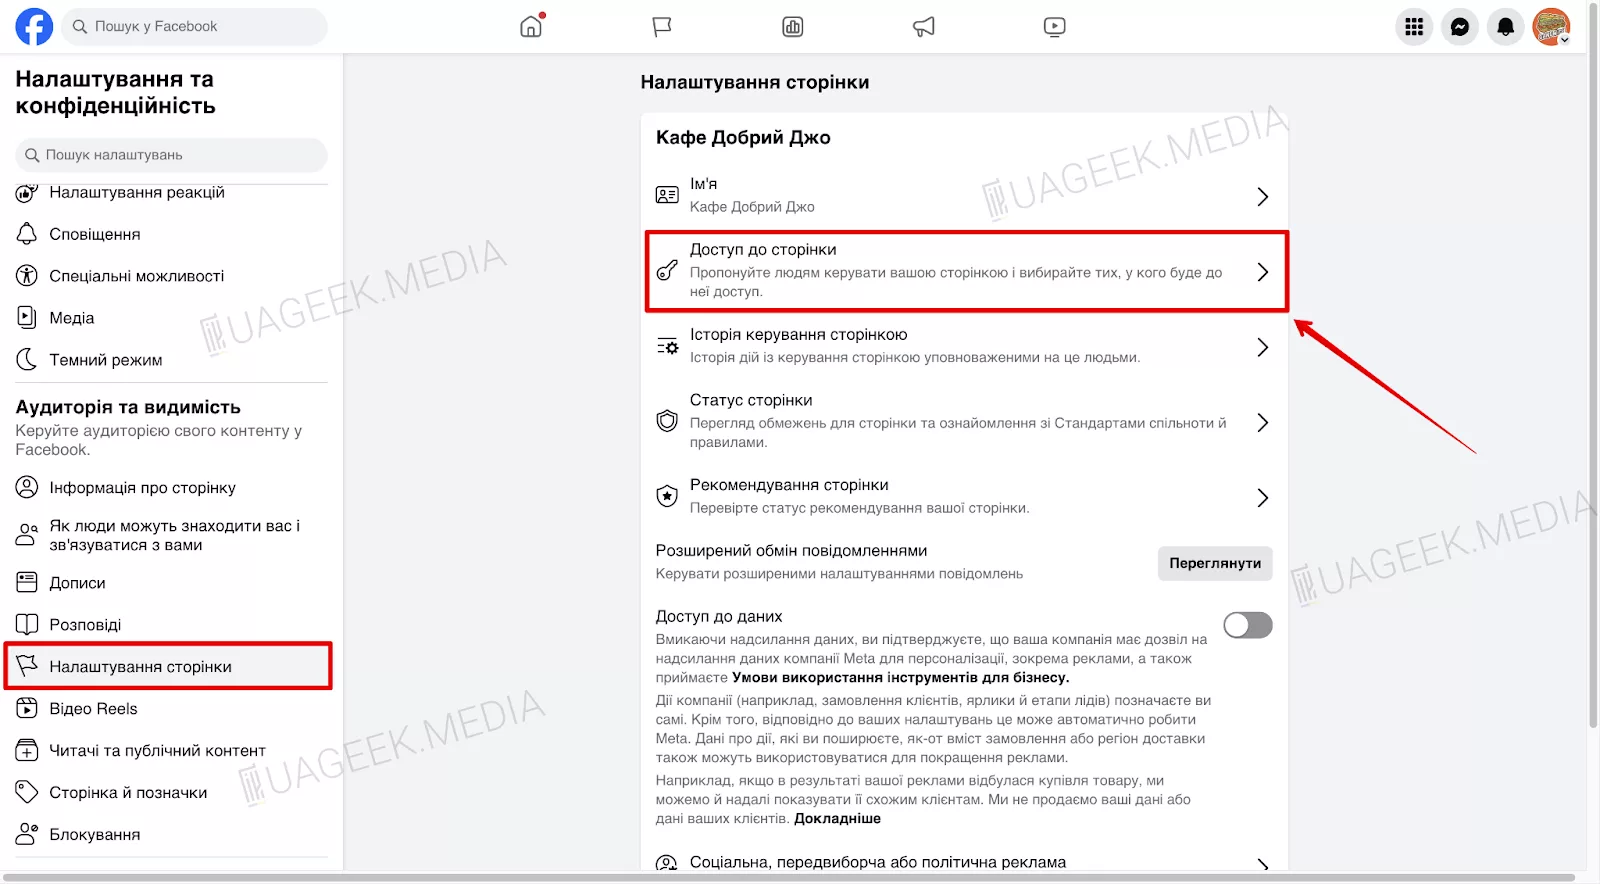
- Choose the access level:
Administrator — full control of the page.
Community manager — can reply to comments and messages.
Moderator — limited access (cannot change settings).
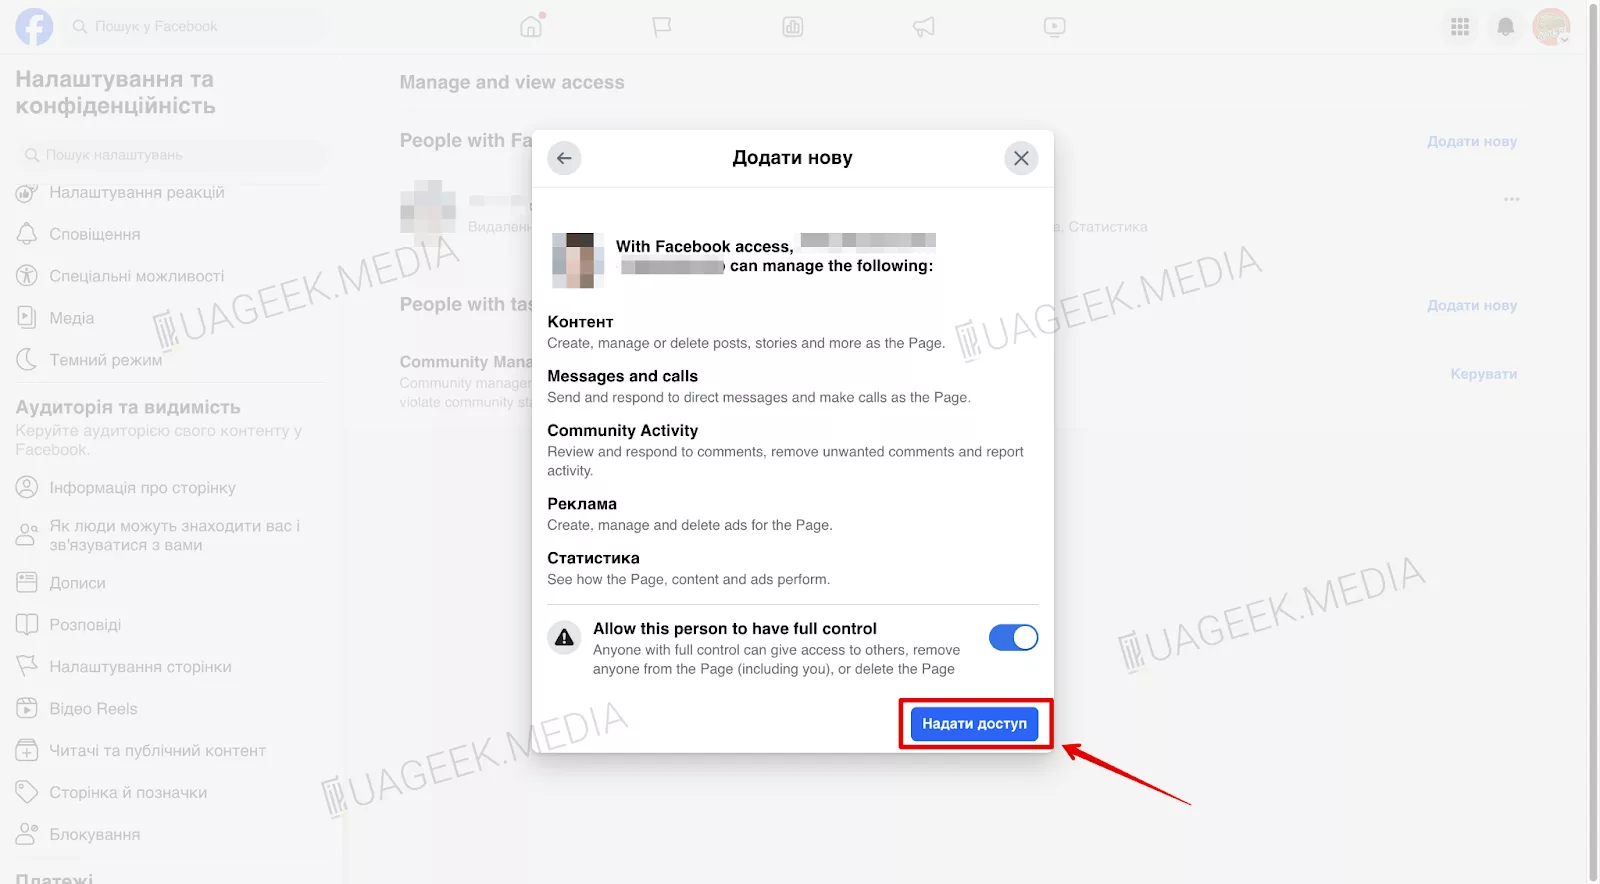
Enter the new admin’s name and email, then confirm by clicking “Grant access.”
Congrats! Your Business Page is created and ready to go.
How to delete a Facebook Business Page?
If you no longer need the page, you can deactivate or delete it.
How to do it:
- Open “Settings.”
- Go to “Access and control.”
- Choose what fits: deactivation (the page disappears but can be restored) or deletion (permanent with no recovery).
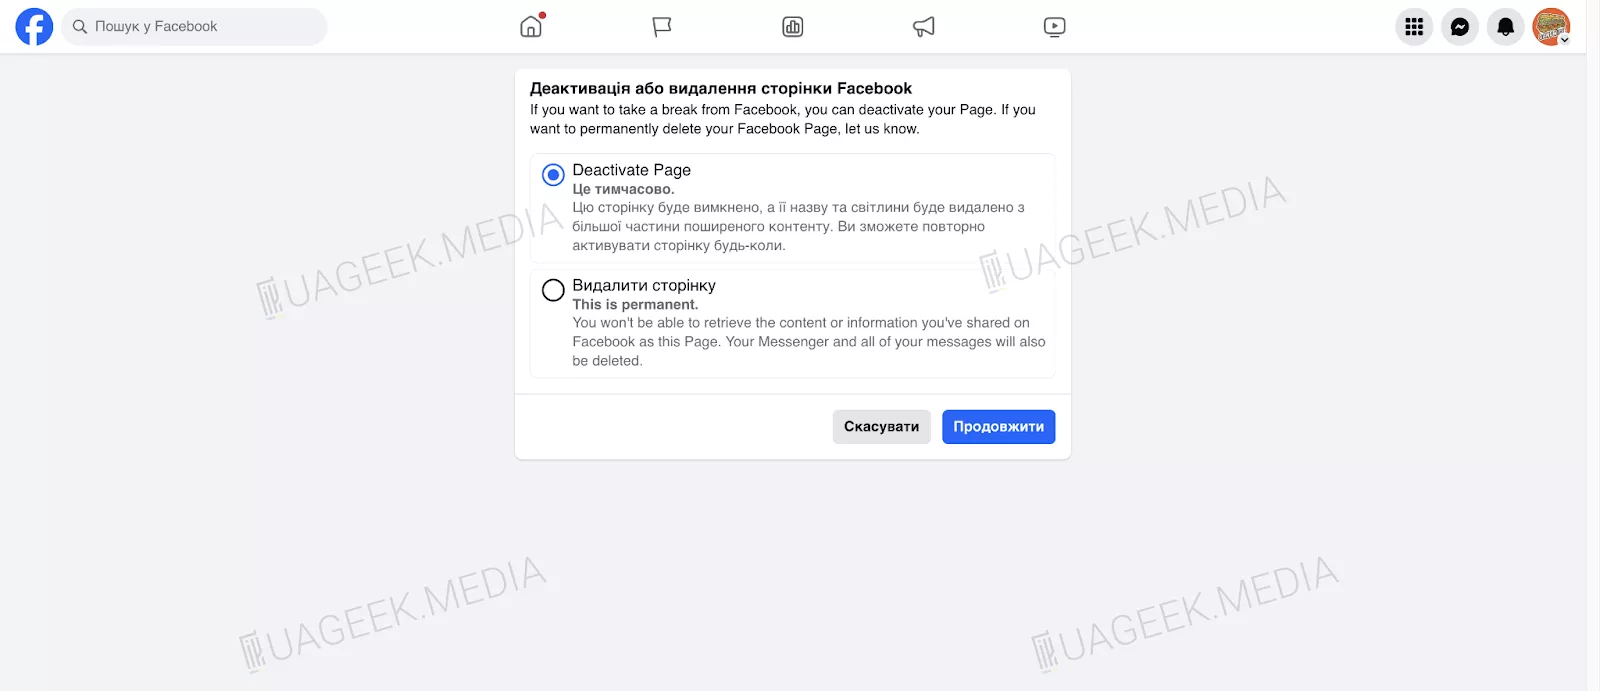
If you’re unsure, it’s better to deactivate the page instead of deleting it entirely.
Use Meta Business Suite
Want simpler management? Use Meta Business Suite — a free tool from Facebook for managing pages and ads.
Here’s what Meta Business Suite offers:
- Post scheduling — plan content a week in advance.
- Analytics — track reach and audience reactions.
- Ad launch — create ad campaigns right in Facebook.
- Manage Facebook and Instagram pages in one place.
With respect, your Geek!