

Tired of setting up columns manually for every single account? We feel you! With a special script, you can significantly simplify your workflow. In the step-by-step guide below, we’ll show you how to transfer your column settings in just a few minutes!
Step 1: Preparing the configuration
Before you begin, you need to properly configure your table settings. For example, you may want to see key metrics such as registration count and app installs. To do this, open the “Columns” → “Customize Columns” menu, as shown in the screenshot below:
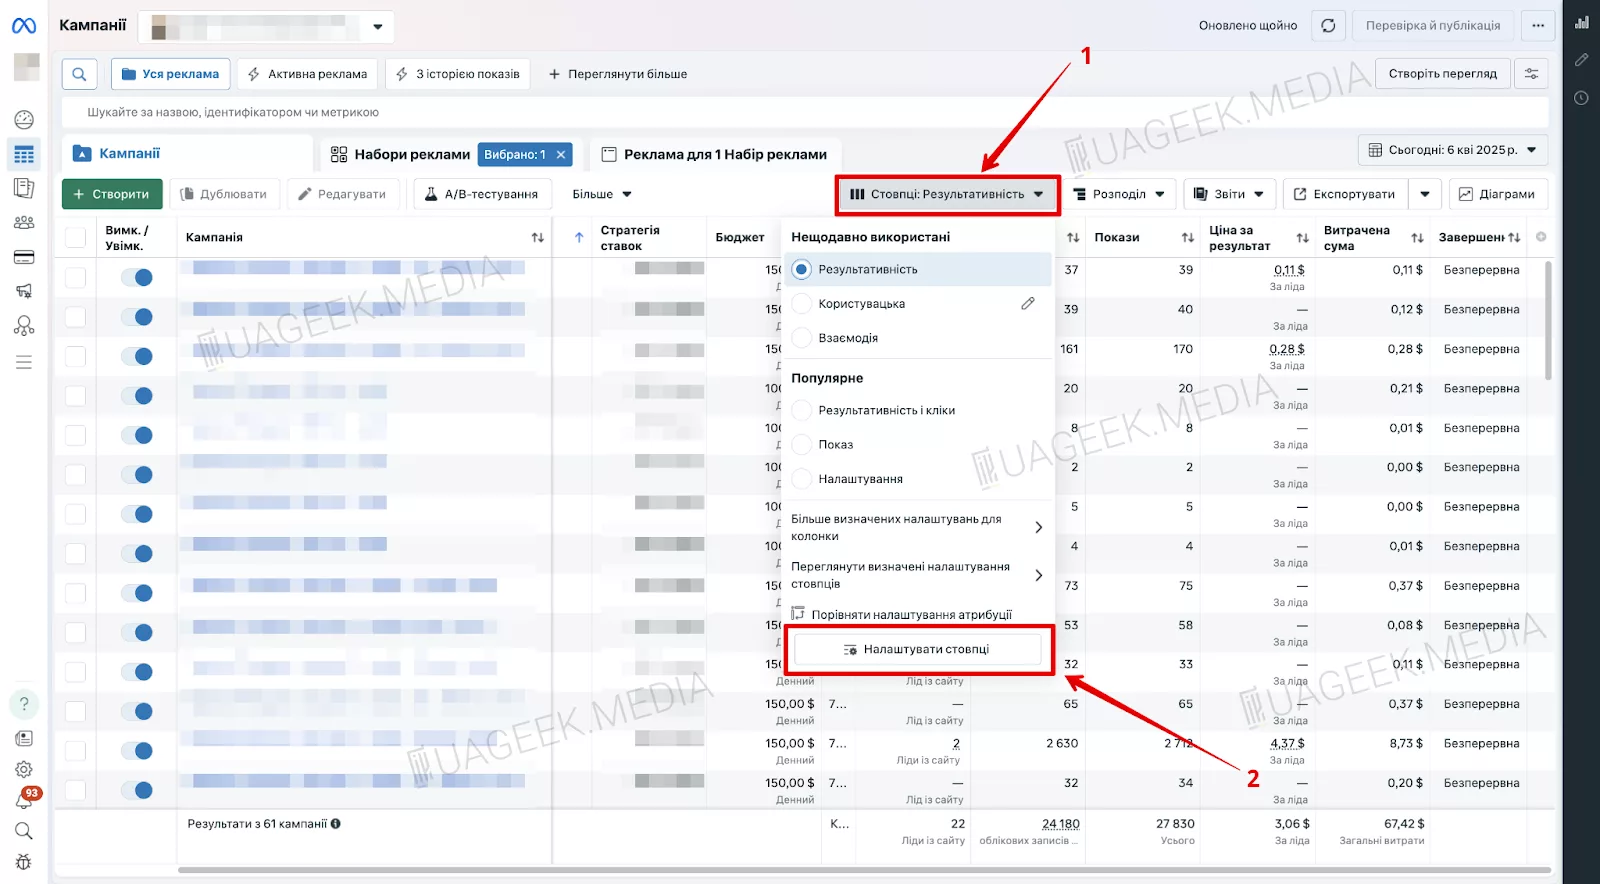
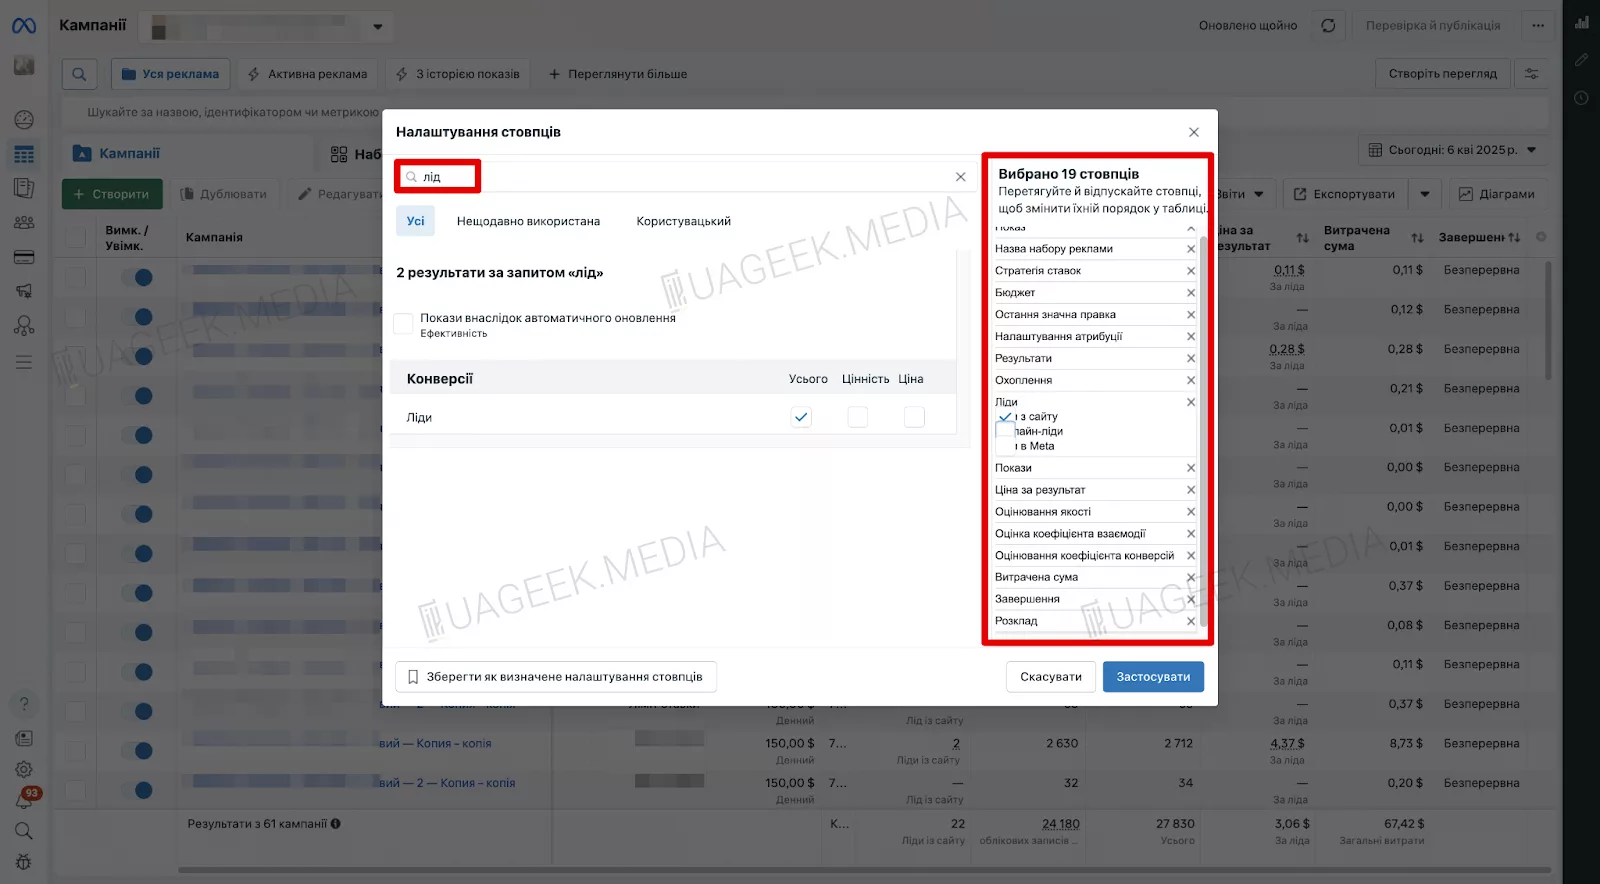
Use the search field to find the categories you need and drag them into the right column (in the exact order you need).
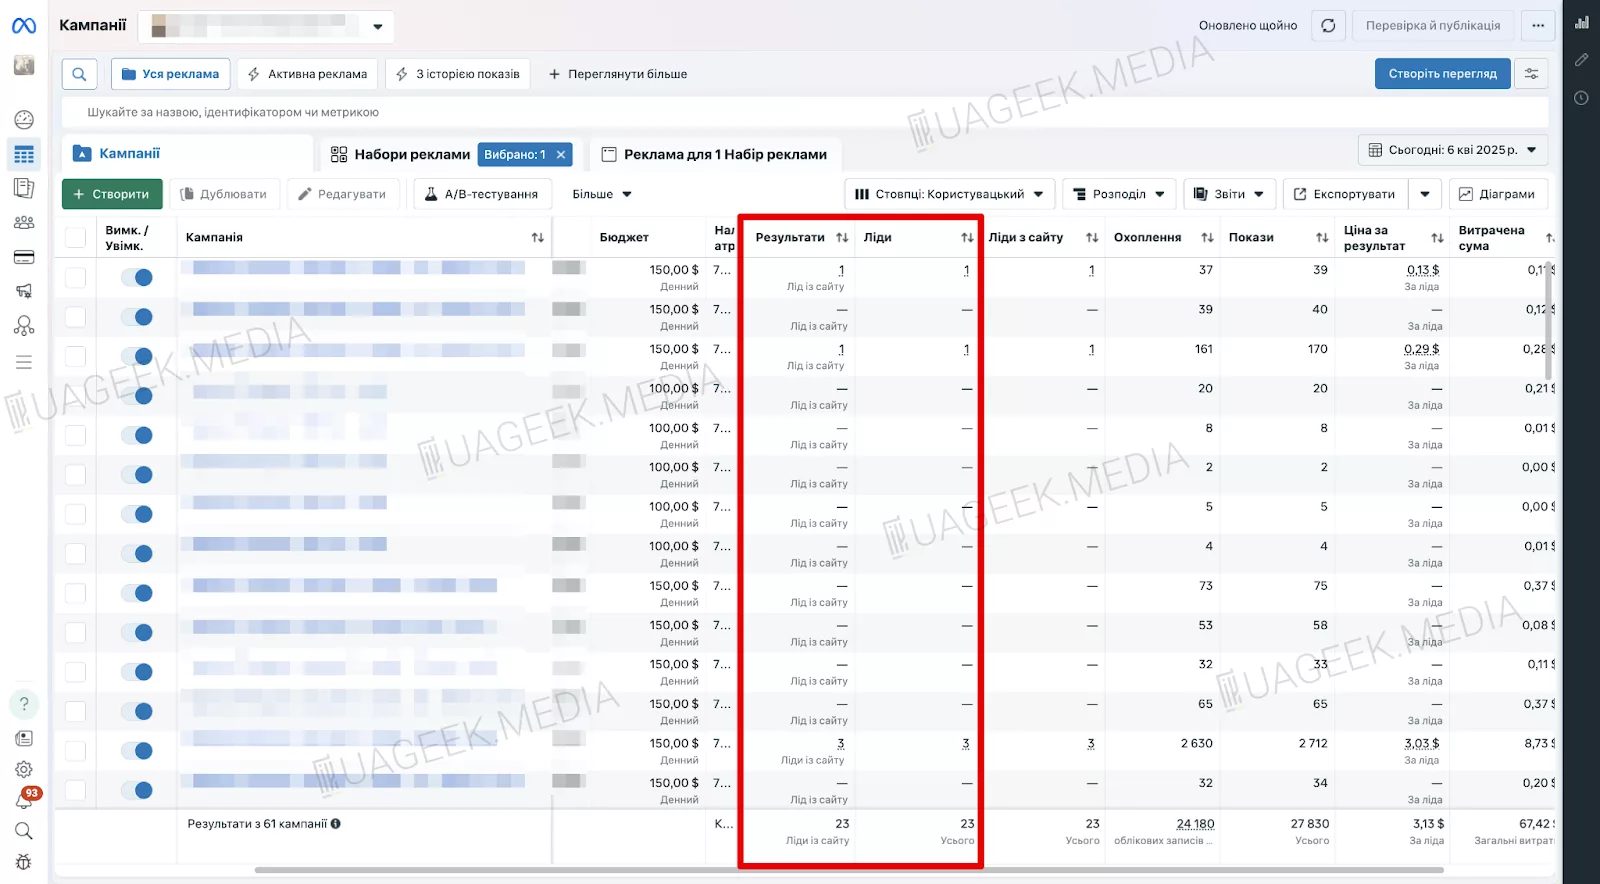
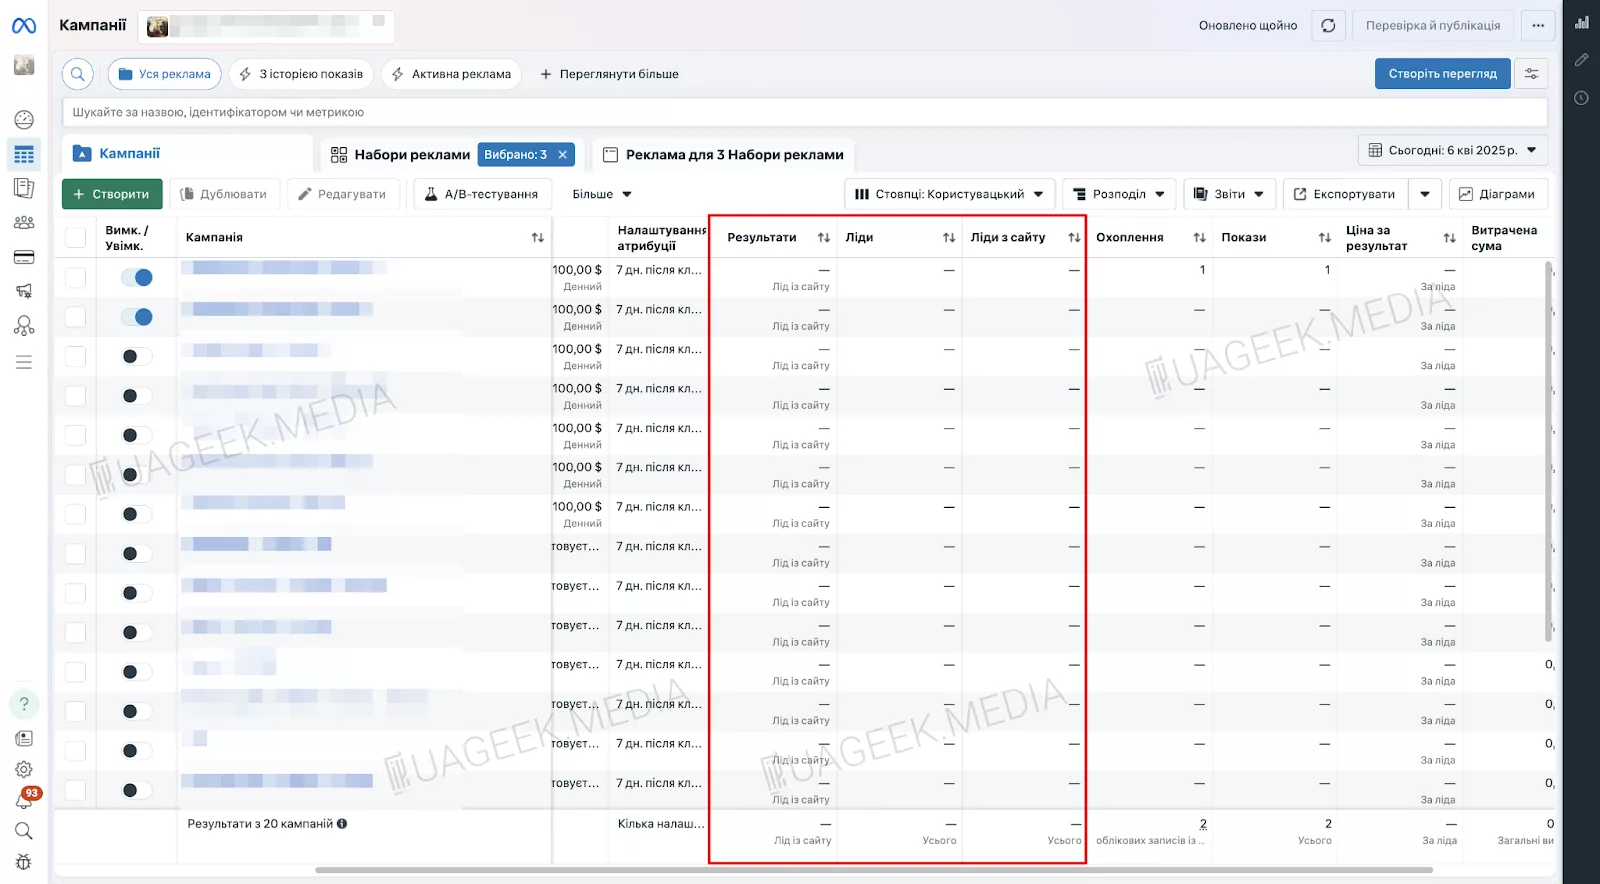
The final result will look like this:
Step 2: Copying column parameters
After setting up the desired order and categories, you need to copy the parameters from the URL after “columns=name”. Meaning everything starting from “columns” to the very end of the link.

Next, insert the copied parameters into the script below, replacing “PARAMETERS_TO_INSERT”:
javascript:(function(){ var currentUrl = window.location.href; var fragment = “”; var hashIndex = currentUrl.indexOf(‘#’); if (hashIndex !== -1) { fragment = currentUrl.substring(hashIndex); currentUrl = currentUrl.substring(0, hashIndex); } var separator = currentUrl.indexOf(‘?’) === -1 ? ‘?’ : ‘&’; var params = “PARAMETERS_TO_INSERT”; var newUrl = currentUrl + separator + params + fragment; window.location.href = newUrl; })();
For example, a configuration that displays results and leads may look like this:
javascript:(function(){var currentUrl=window.location.href;var fragment=””;var hashIndex=currentUrl.indexOf(‘#’);if(hashIndex!==-1){fragment=currentUrl.substring(hashIndex);currentUrl=currentUrl.substring(0,hashIndex);}var separator=currentUrl.indexOf(‘?’)===-1?’?’:’&’;var params=”columns=columns=name%2Cdelivery%2Ccampaign_name%2Cbid%2Cbudget%2Clast_significant_edit%2Cattribution_setting%2Cresults%2Cactions%3Alead%2Cactions%3Aoffsite_conversion.fb_pixel_lead%2Creach%2Cimpressions%2Ccost_per_result%2Cquality_score_organic%2Cquality_score_ectr%2Cquality_score_ecvr%2Cspend%2Cend_time%2Cschedule&attribution_windows=default&locale=ua_UA”;var newUrl=currentUrl+separator+params+fragment;window.location.href=newUrl;})();
Step 3: Adding the script to your browser bookmarks
Once the script is ready, copy it entirely and paste it into your anti-detect browser.
If you don’t see the bookmarks bar — no worries. Use Ctrl+Shift+B. Then right-click on the bookmarks bar and select “Add page”. Paste the script into the “URL” field.
Step 4. Checking the result
Refresh your Ads Manager page and test the bookmark. Below is the BEFORE screenshot:
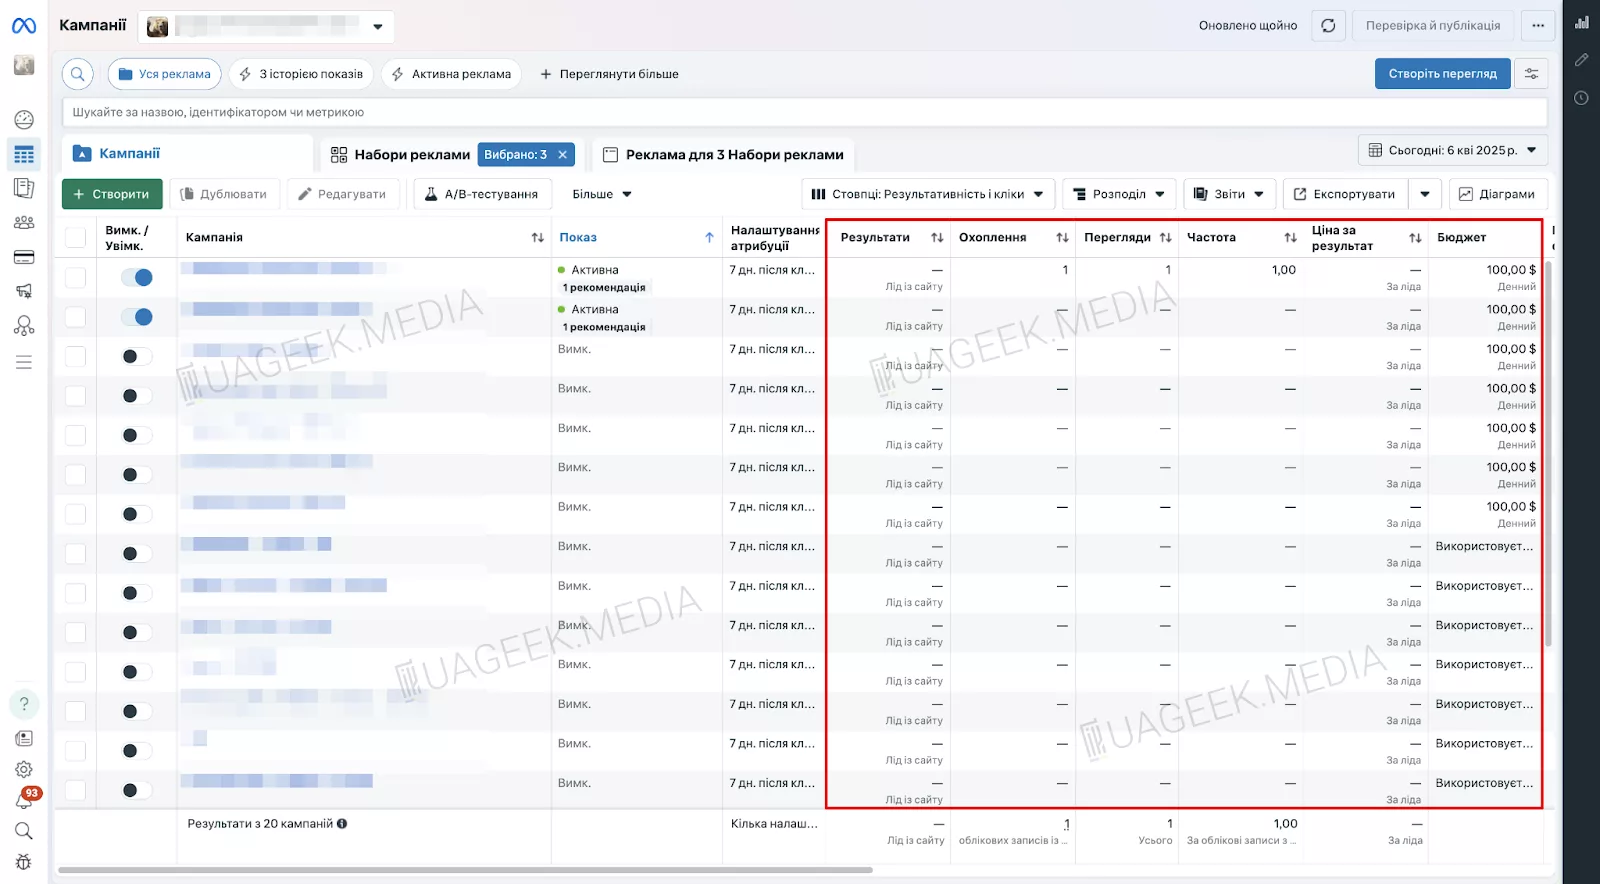
And here is the AFTER:
Congrats — you can now optimize your workflow and configure Facebook Ads reports in just a few clicks!