

In this article, we break down ways to quickly transfer Facebook advertising campaigns to another account. The process does not take much time and does not require deep technical knowledge.
This method allows you to preserve the entire campaign structure:
- Ad sets
- Ads
- Creatives
- Texts, links, and UTM tags
In this guide, we will walk through all stages of the process with comments and explanations.
Option #1: Transfer ad campaigns using Excel
To quickly transfer Facebook Ads campaigns using Excel, follow these steps:
1. Log in to the ad account from which you want to copy existing campaigns.
2. Select the required campaigns, ad sets, and ads from the list (check the boxes next to each element).
3. Go to the “Ads” tab. Open the menu above the campaigns and click: “More” → “Export” → “Export selected”.
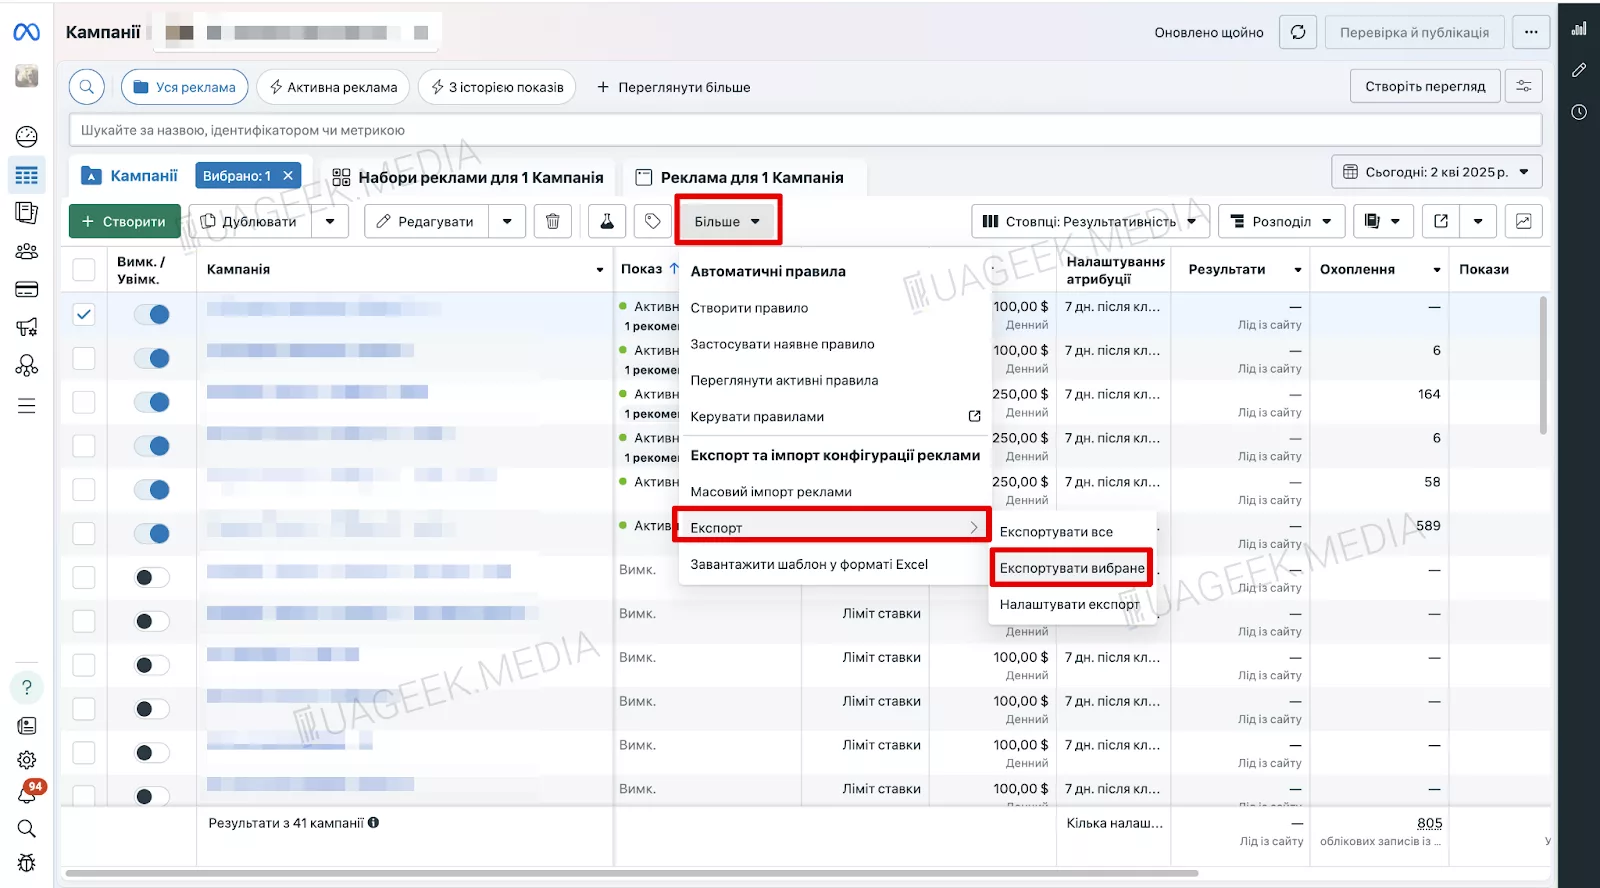
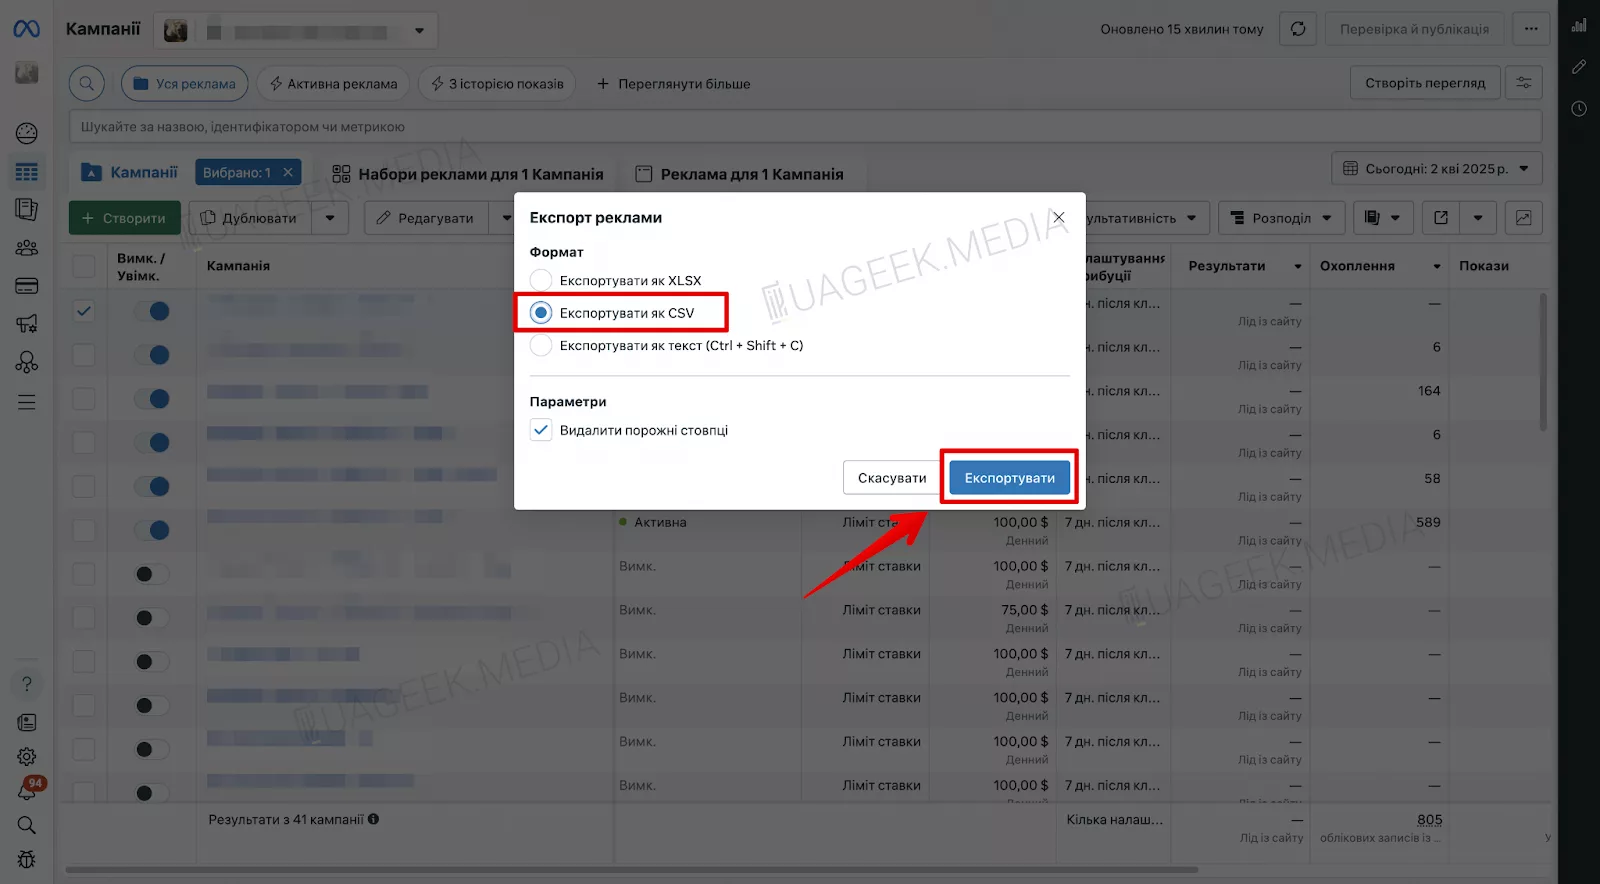
In the window that appears, select the “Export as CSV” format. Click the “Export” button (bottom-right corner) to start downloading the file.
The file will contain all required data in a table format. Despite being a text-based format, after import, ads, creatives, links, and UTM tags will be preserved. Nothing will be lost.
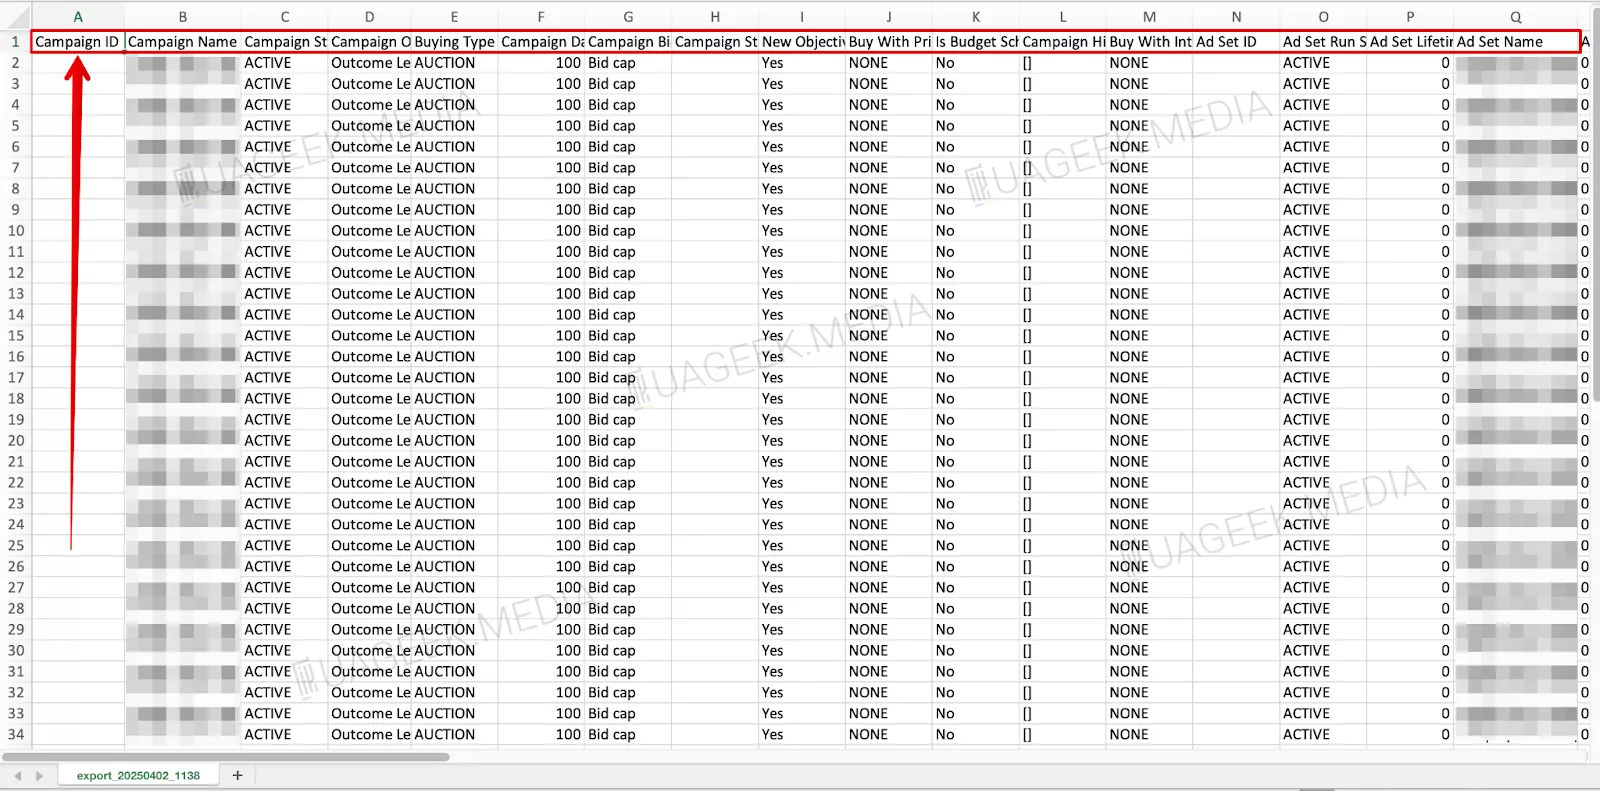
To avoid ID duplication, you must delete the values in the following columns (keep the columns themselves):
- Campaign ID;
- Ad Set ID;
- Ad ID.
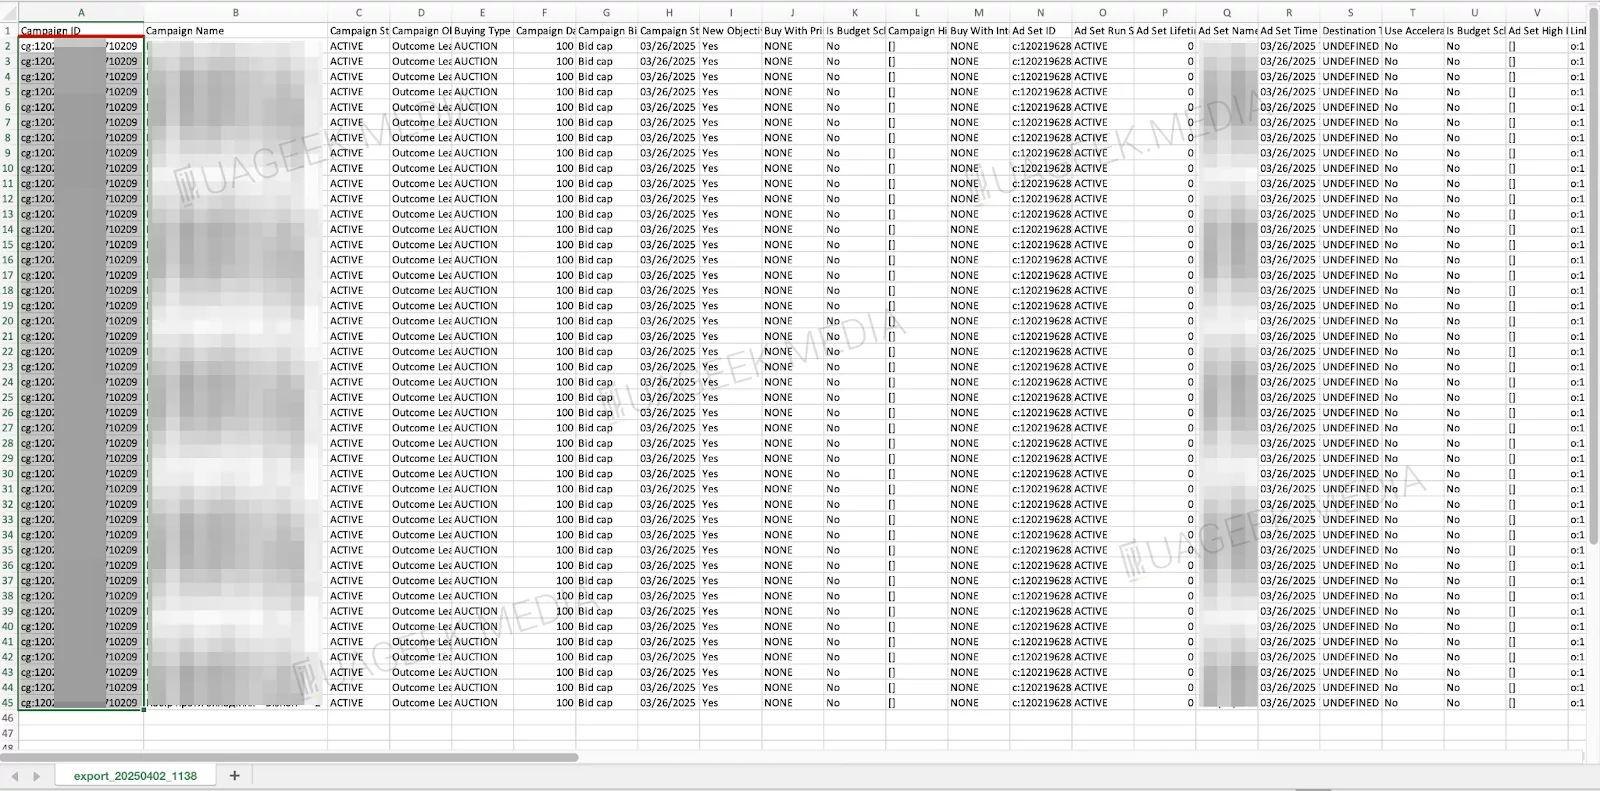
Facebook will automatically generate new IDs during the import.
IMPORTANT: If your ad texts contain symbols such as “+”, “-”, “=” or “@”, the file may show <> before them. For example, if the text was “-10% discount”, the table may display <> -10% discount. Do not delete these symbols — they will disappear during import. Make sure to save the file after editing.
How to import campaigns into a new account
1. Log in to the new ad account.
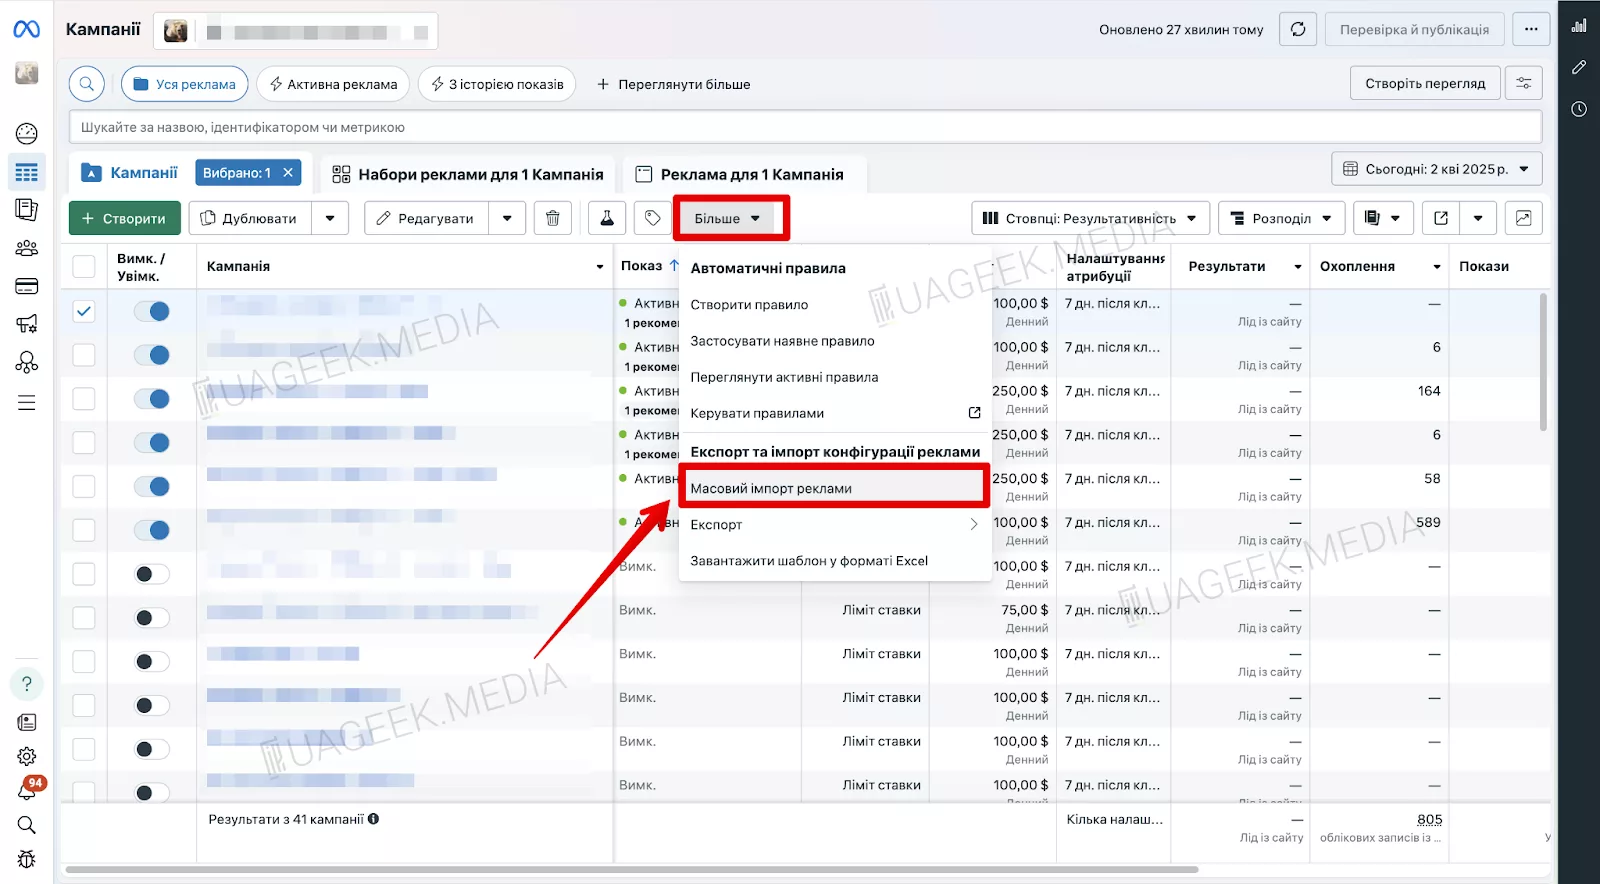
2. Open the “Export and Import” section and select “Bulk Ad Import”.
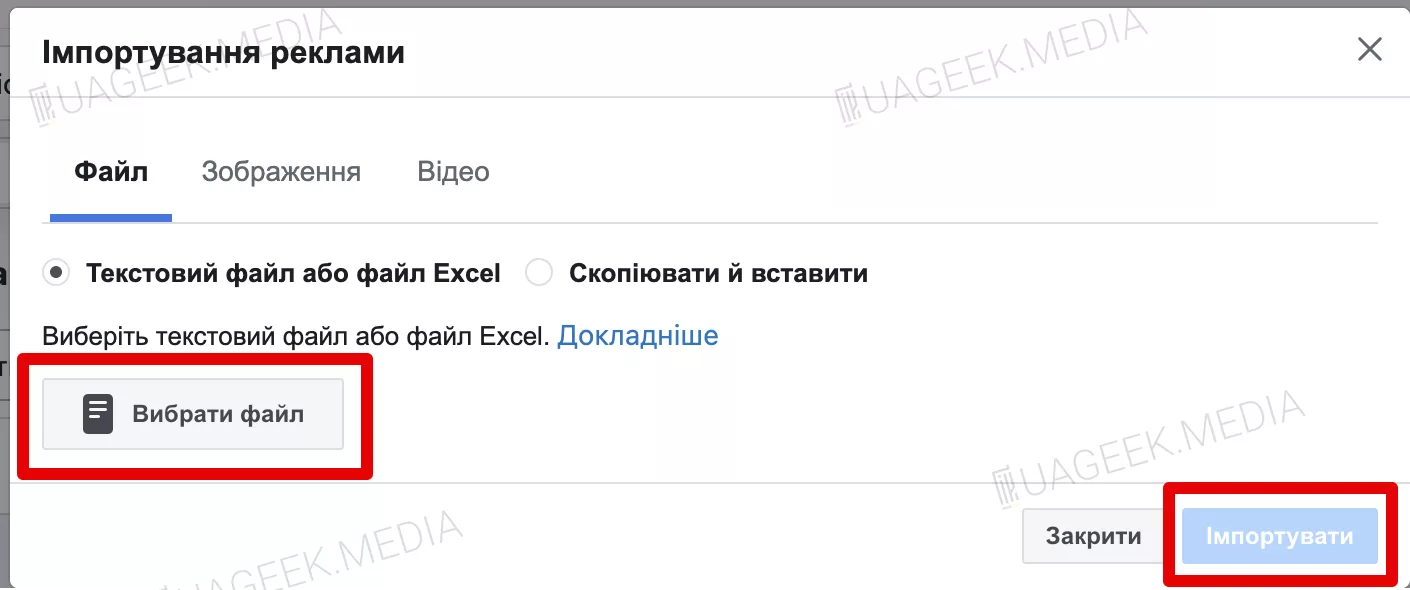
3. Upload the prepared .csv file and confirm the action.
After that, the campaign will appear in the account along with all ads, links, creatives, and UTM tags.
What can go wrong?
Sometimes during the transfer, Facebook may reset pixel settings. Before publishing, make sure that:
- the pixel is connected and working correctly;
- audiences are saved or shared via Business Manager;
- access to Fan Pages has been granted to the new account.
Option #3: Transfer ad campaigns using Google Sheets
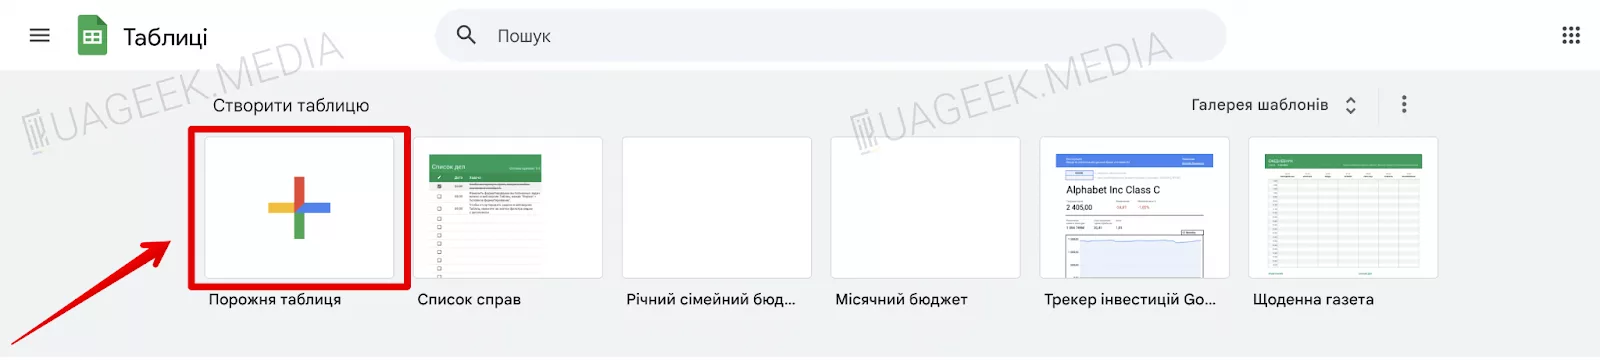
This procedure almost completely mirrors the Excel method, but instead of a desktop editor, Google Sheets is used. Upload the .csv file and go to Google Sheets. On the screen that opens, select “Blank spreadsheet”.
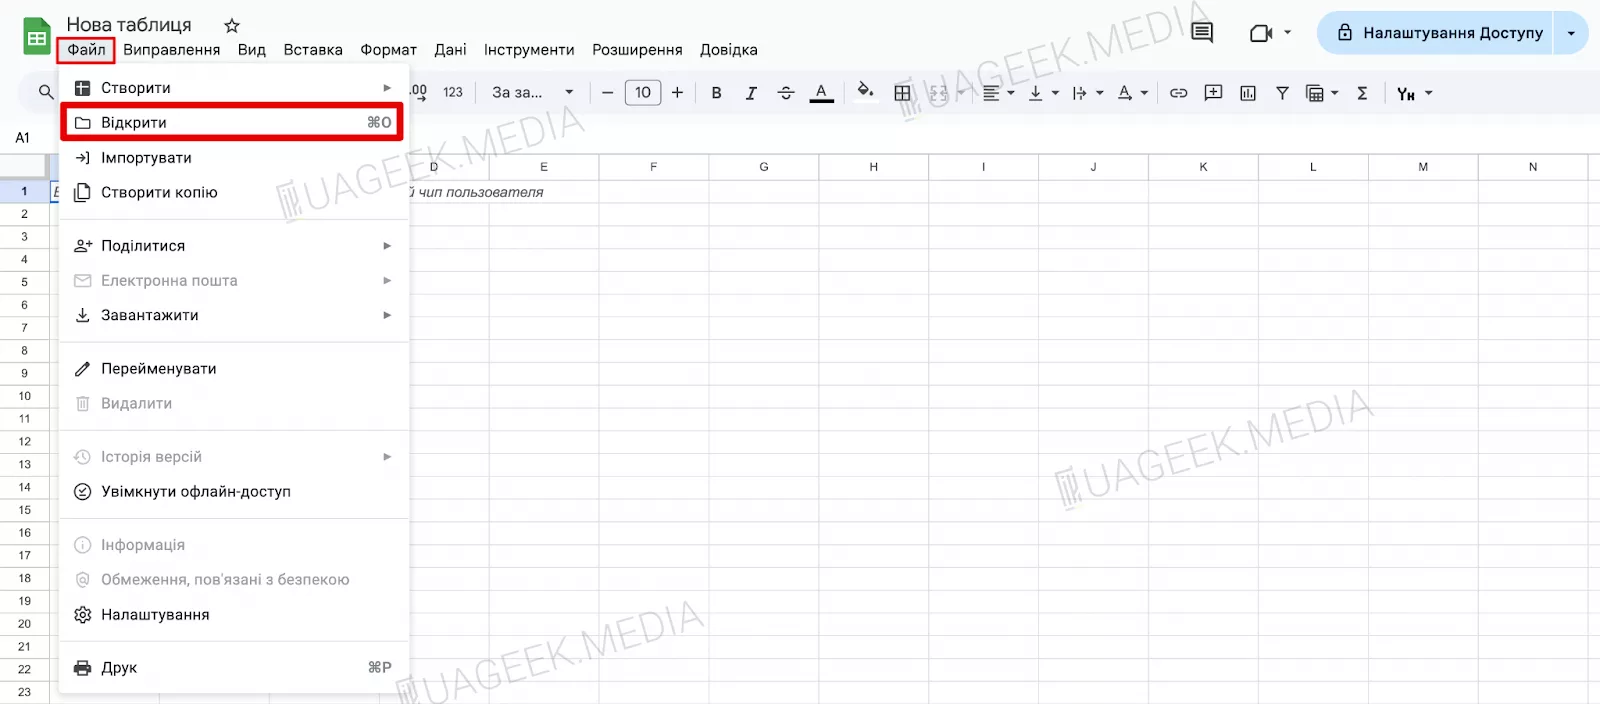
Then go to “File” → “Open”.
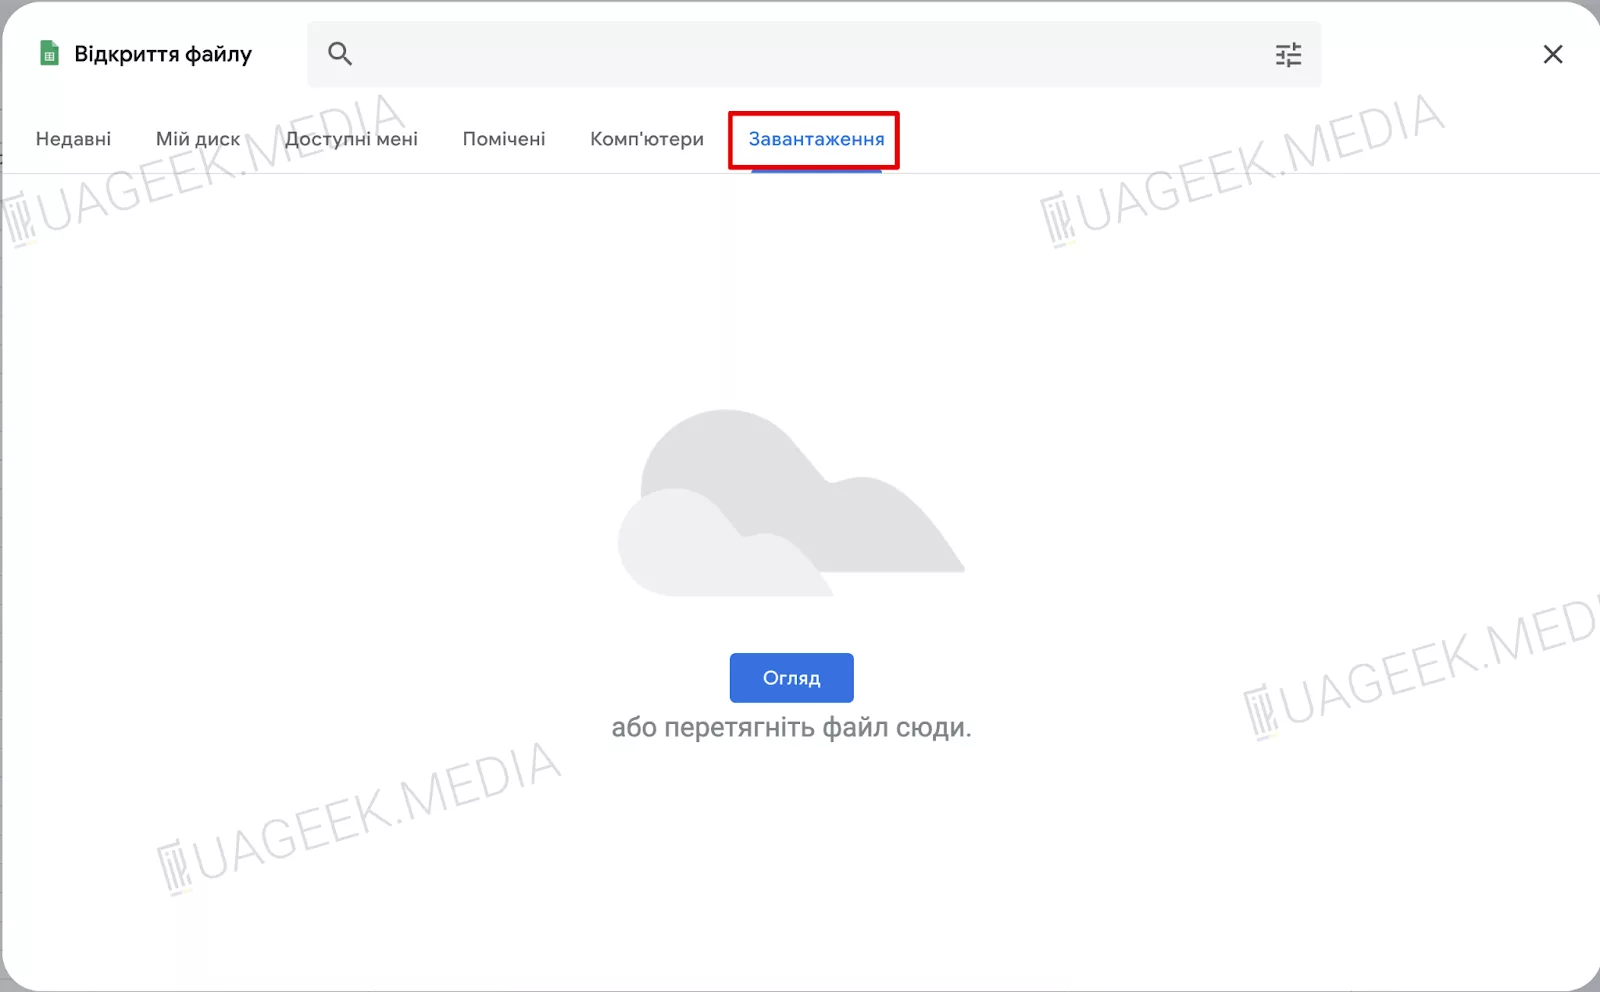
Upload your .csv file and it will open in the spreadsheet.
As in Option #1, remove values from the Campaign ID, Ad Set ID, and Ad ID columns (do not delete the columns themselves). Save the edited file and import it into Facebook Ads as described above.
Things to keep in mind
- If campaigns use saved or lookalike audiences, they must be shared via Business Manager.
- Saved audiences will still need to be recreated manually.
- Both accounts must be linked to the same Business Manager.
- Do not delete audiences in the old account, otherwise they may disappear from the new one as well.
That’s it! This method allows you to quickly and smoothly transfer Facebook ad campaigns to a new account. The key is to properly prepare the file before import, remove old IDs, and double-check all settings after the transfer.